Hydro is upgrading the electrical service in our area and today the power is off while they replace a nearby hydro pole.
At about 9:30am the power goes off and the process begins. They go from this…
Getting ready to remove the old wooden pole
… to this.
The new fibreglass pole is in place and most wires moved over and connected
Four houses are directly connected to this pole. Their connections were cut off and a ground crew attached extensions to these connections for re-attachment later in the day. While this was happening the person in the aerial bucket disconnected all the wires from the pole and removed all the various attachments like the transformer and cross bars.
Once everything was disconnected from the pole it was cut into several pieces and lowered to the ground. All this happened while the boom truck was wedged between two garages.
A different boom truck was brought in to place the new pole and a vacuum truck prepped the hole and suctioned away the debris. With the new pole carefully put in place a new transformer is attached and all the lines are re-attached. These lines are all “live” and the one at the top of the pole is the main power wire. I have no idea what the voltage is but it’s a lot. The guy is very careful to keep everything insulated and isolated during the process.
As promised the power went back on shortly after 4pm. the house was starting to get a little cool so we’re very thankful to have everything up and running again. Quite an eye opener to realize just how dependent we are on electricity and how much we just take it for granted. There were so many times we tried to flip on a light switch or were surprises why the fridge was so dark and that we can’t warm up some lunch in the microwave. We had flashlights and of course the phones but the flashlight batteries could use a refresh as they were quite dim.
Sunset was 4:36pm and they did continue working for a while in the twilight. An excellent job and you could tell they were really hustling towards the end to make the 4pm deadline.
Away with the old transformerInsulating the top hot wireWires are detached and the top of the pole is removedThings were quiet for a bit, lunch break.New machine in place to prep the holeThe new pole is maneuvered into placeLines are re-attachedNew transformer is bolted in placeAlmost done
Two days later the boom truck is back and it seems like they are re-tensioning all the bolts connecting various parts to the pole. In about an hour they are gone and the job seems complete.
Right on time the electricians arrived just before 8:30am to start on the electric wiring repair where service enters the house.
We’re about to find out how well we can cope with a short (hopefully) power outage as they replace a section of the wire between the meter and the mast.
8:44 – power is off
After about 30 minutes the electricians are done. Now we’re waiting for the city inspector.
90 minutes later and the inspection arrives. After 5 minutes the inspection is done and passed. Now we’re waiting for Hydro to do the reconnect. It’s 12 noon
So at 2:20pm there is still no hydro guy. I call and after a couple of transfers and a call back, “he will be there in 30 minutes “. House is cooling a bit but here on the sofa under a sunny window it’s pretty nice.
3:12 and hydro is here and 3:45 the power is back!
New wires connected to the mains
Made a few changes around the house during our outage. We still have a land line but all of the handsets are wireless and depend on power to the base station. All except the old school phone in the basement shop. This is not super convenient. I thought the bedroom corded phone would be ok but nope, it’s plugged into the wall too! So, I replaced it with the old phone from the lake, where there is no more land line.
The main bathroom doesn’t have any windows so it’s a little dark. I just happened to have purchased some battery operated cabinet lights, also handy in a power outage.
I heard a noise in the night. It was a windy night and our hydro wires are right outside the bedroom window. They usually make some noise on a windy night, but this was different.
The next day while getting something from the shed I looked at the hydro wires and saw what was causing the noise
Broken insulator
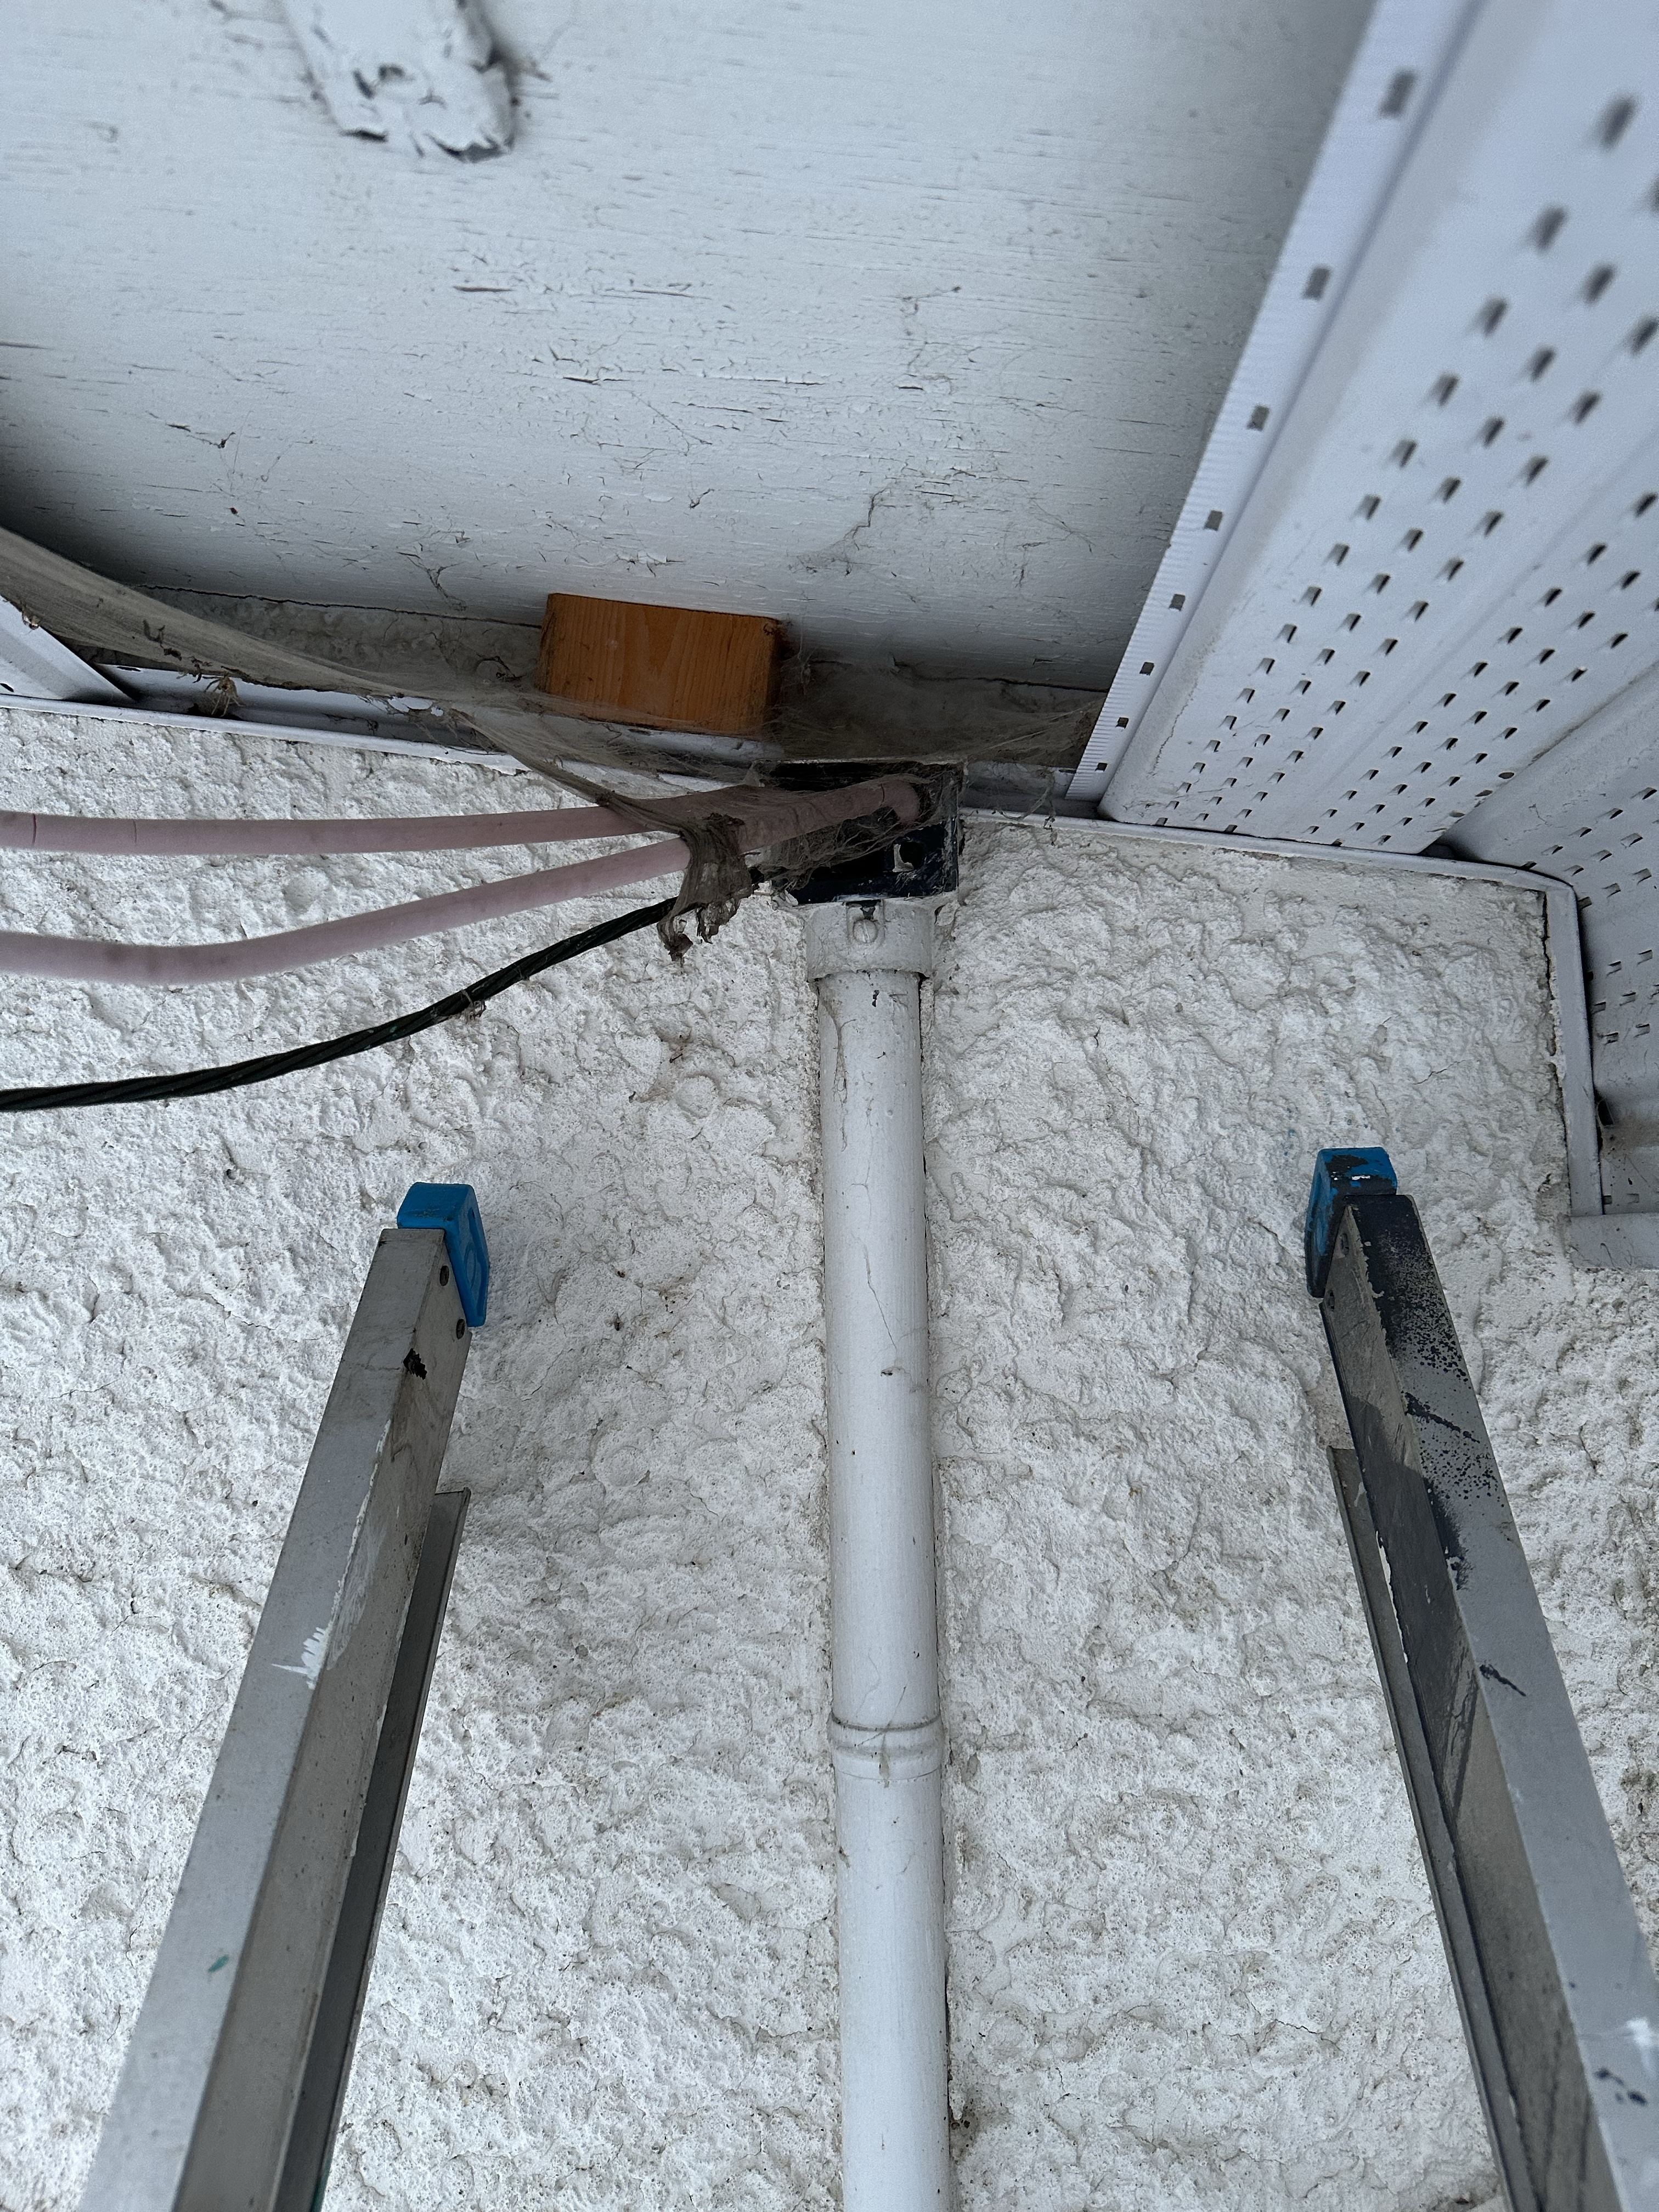
The insulator (middle left) had broken which released the strain cable from the under eves bracket (top centre). Now the power wires are taking the load of the line to the pole. This didn’t seem too good so I called hydro thinking they would come out a fix it.
Well, they came out, had a look and then informed me about this!
Cracks in the wiring insulation
Both the red power wires have cracks in the insulation right around the wire. It’s original wire, about 58 year old. The hydro guys said they could re-attach the cable to the bracket but there would be about a 50% chance the wire would break and/or a lot of insulation would come off. In either case they would turn off the power to the house. In fact they were only OK with leaving the power on in it’s current condition if we called an electrician today and had it repaired ASAP. Turns out the wire from the meter to the top of the mast where it connects to the hydro line is the home owners responsibility.
Other Hydro guy good news was that our mast in not up to the current code which requires the conduit to go through the roof to a mast head above the roof as opposed to a bracket on the eves. However, we might be “grandfathered”. If we need to come up to code he estimated $3,000+, yikes!
So I check around for a recommendation on an electrician and make the call. He seems quite good and ready to do the work. I send my contact info an some pictures and he offers to stop over tonight and have a look.
In response to one of the pictures he says the soffit will need to come off. I ask Scott to stop by that evening and he removes the soffit for me.
Soffit off
While he’s here the electrician arrives and checks out the wiring. He’s already checked with the City of Winnipeg electrical inspector and I’ll be allowed to just replace the wire from the meter to the mast head, the way less expensive option. With permits and coordination the repair should get done in about a week. Hopefully, before the wires break which would be a whole new scheduling problem.
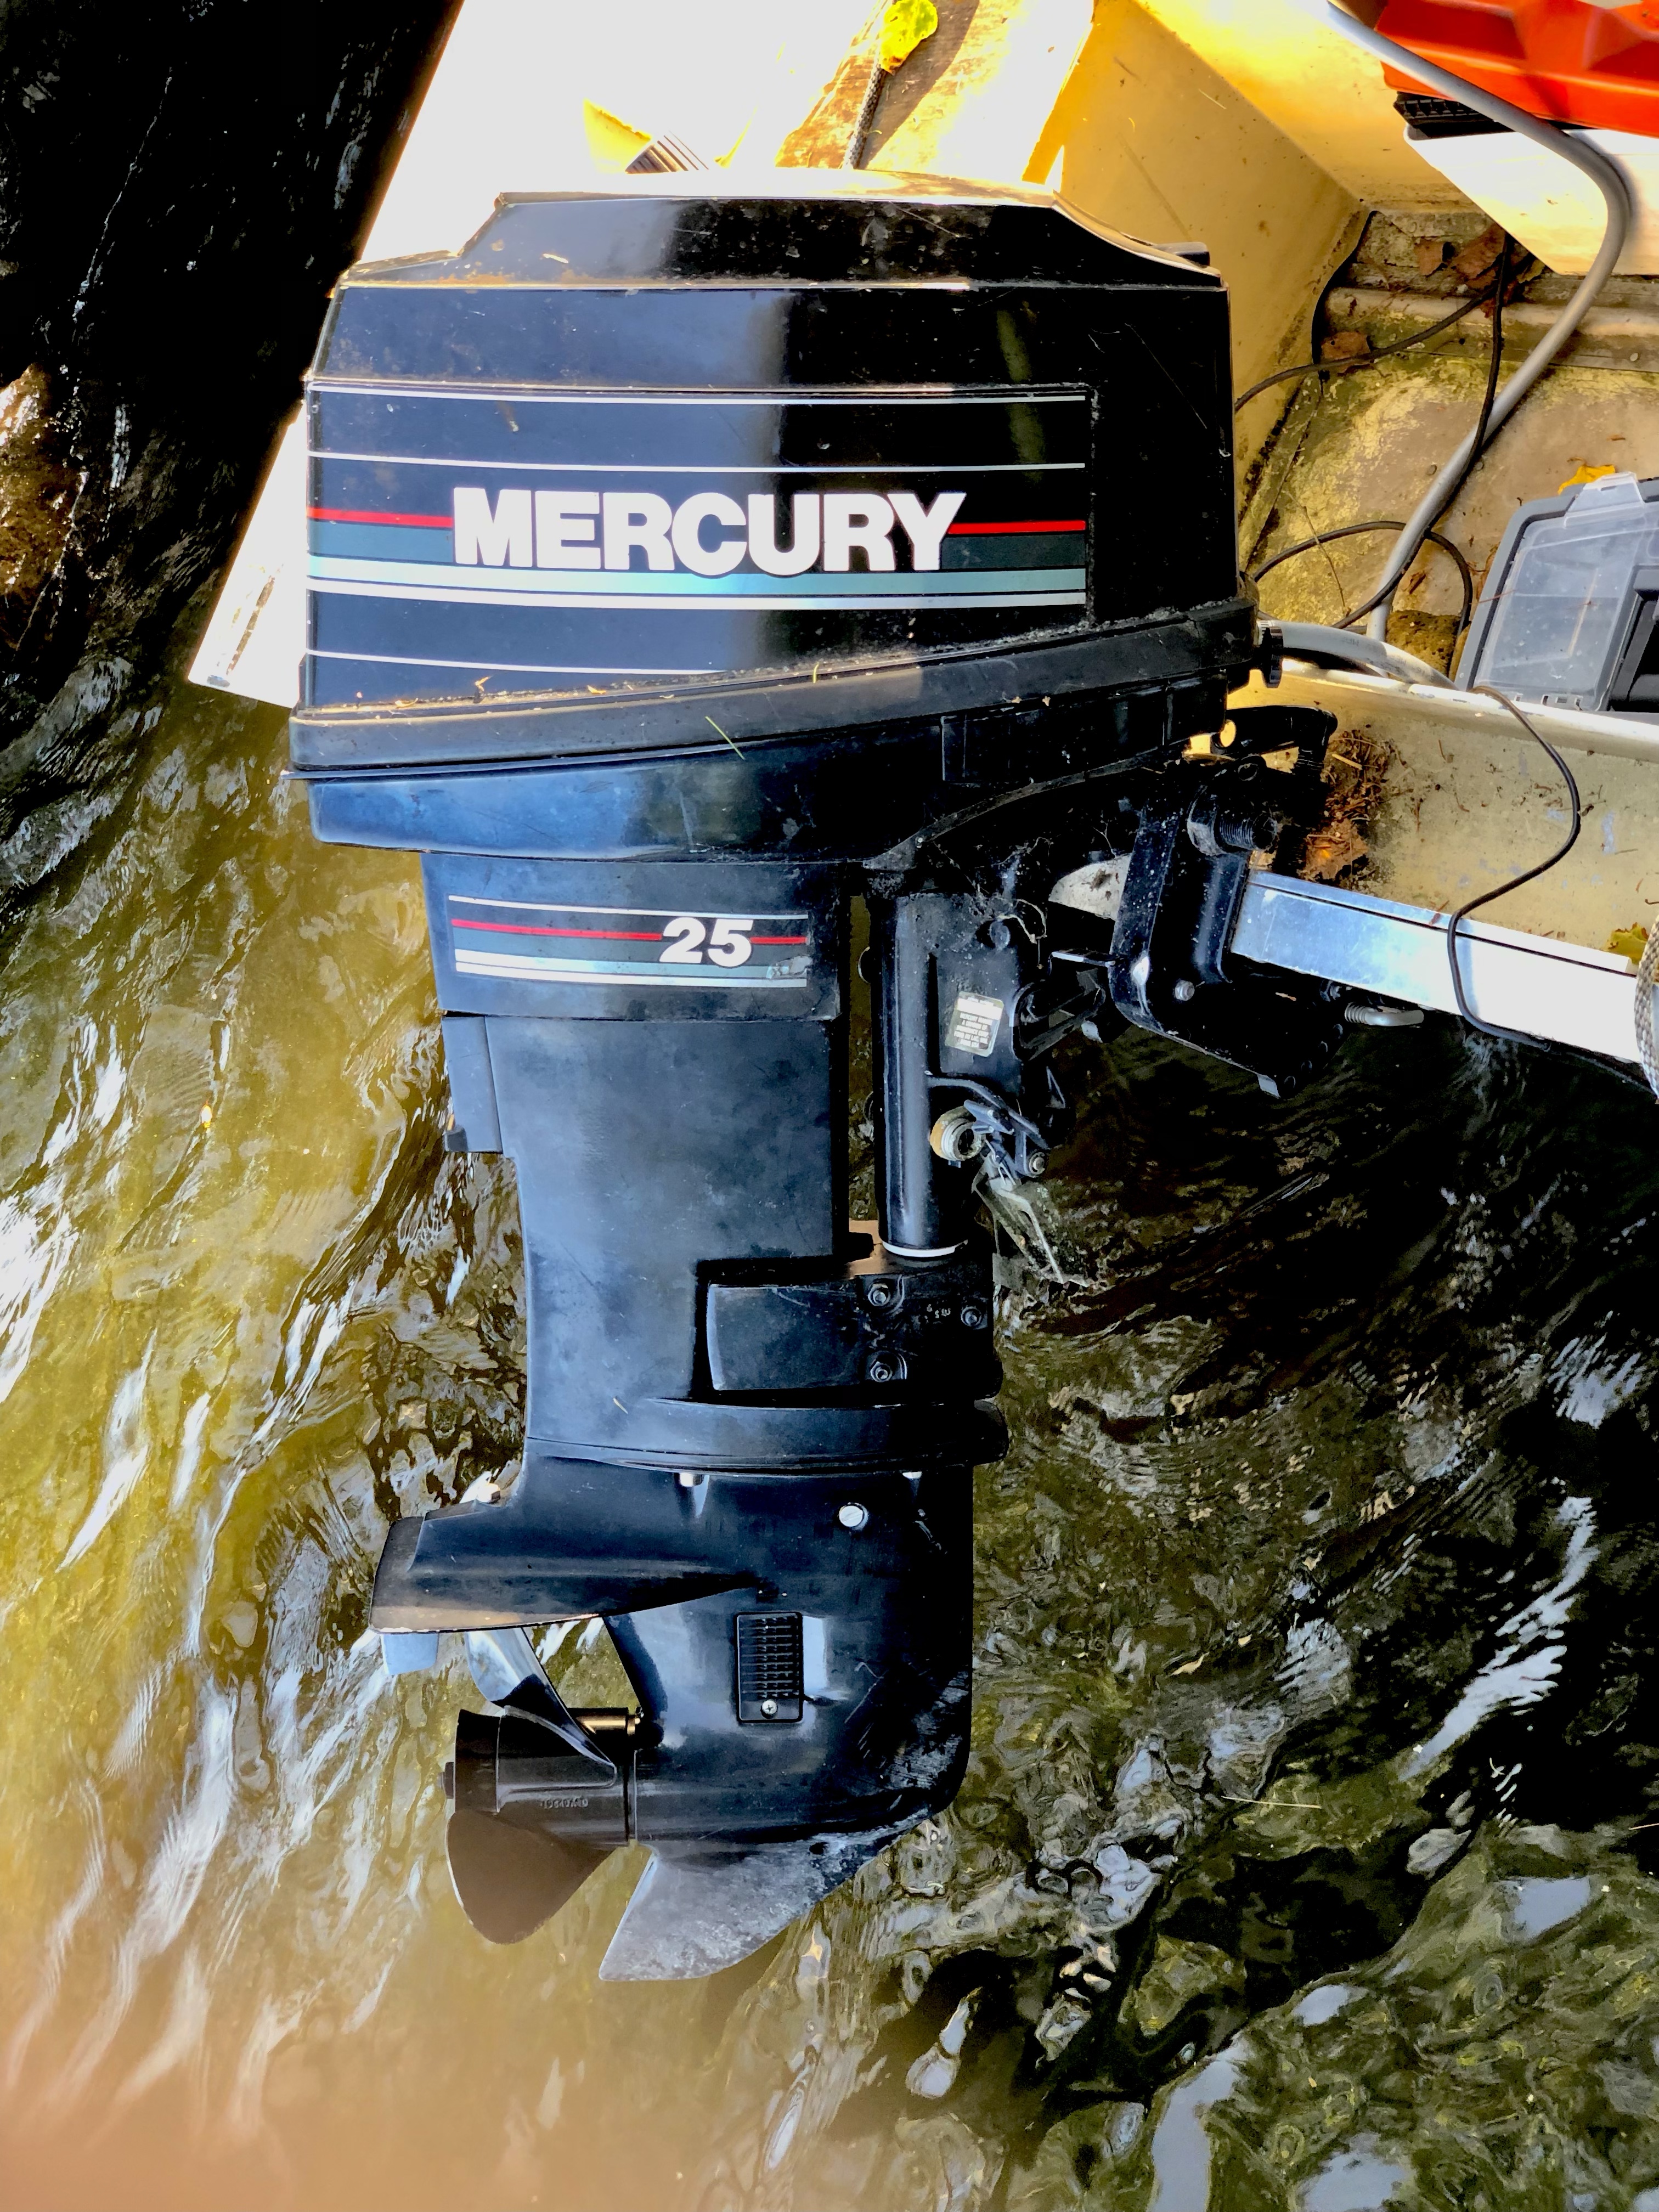
A couple of years ago the electric start on our 1990 Mercury 25hp outboard stopped working. I’d thought about taking it in to a marina to get it repaired but that would be awkward, put the boat out of commission for an unknown amount of time and likely be costly. It still started well with the manual “pull the rope” method so nothing was done. This year it was the target of a DIY repair.
Shorty after opening the cottage on the May long weekend I noticed a beam supporting the deck on the lower north side had some very bad rot and was collapsing! Also, some of the posts supporting this beam were in pretty rough shape too! Part 1.
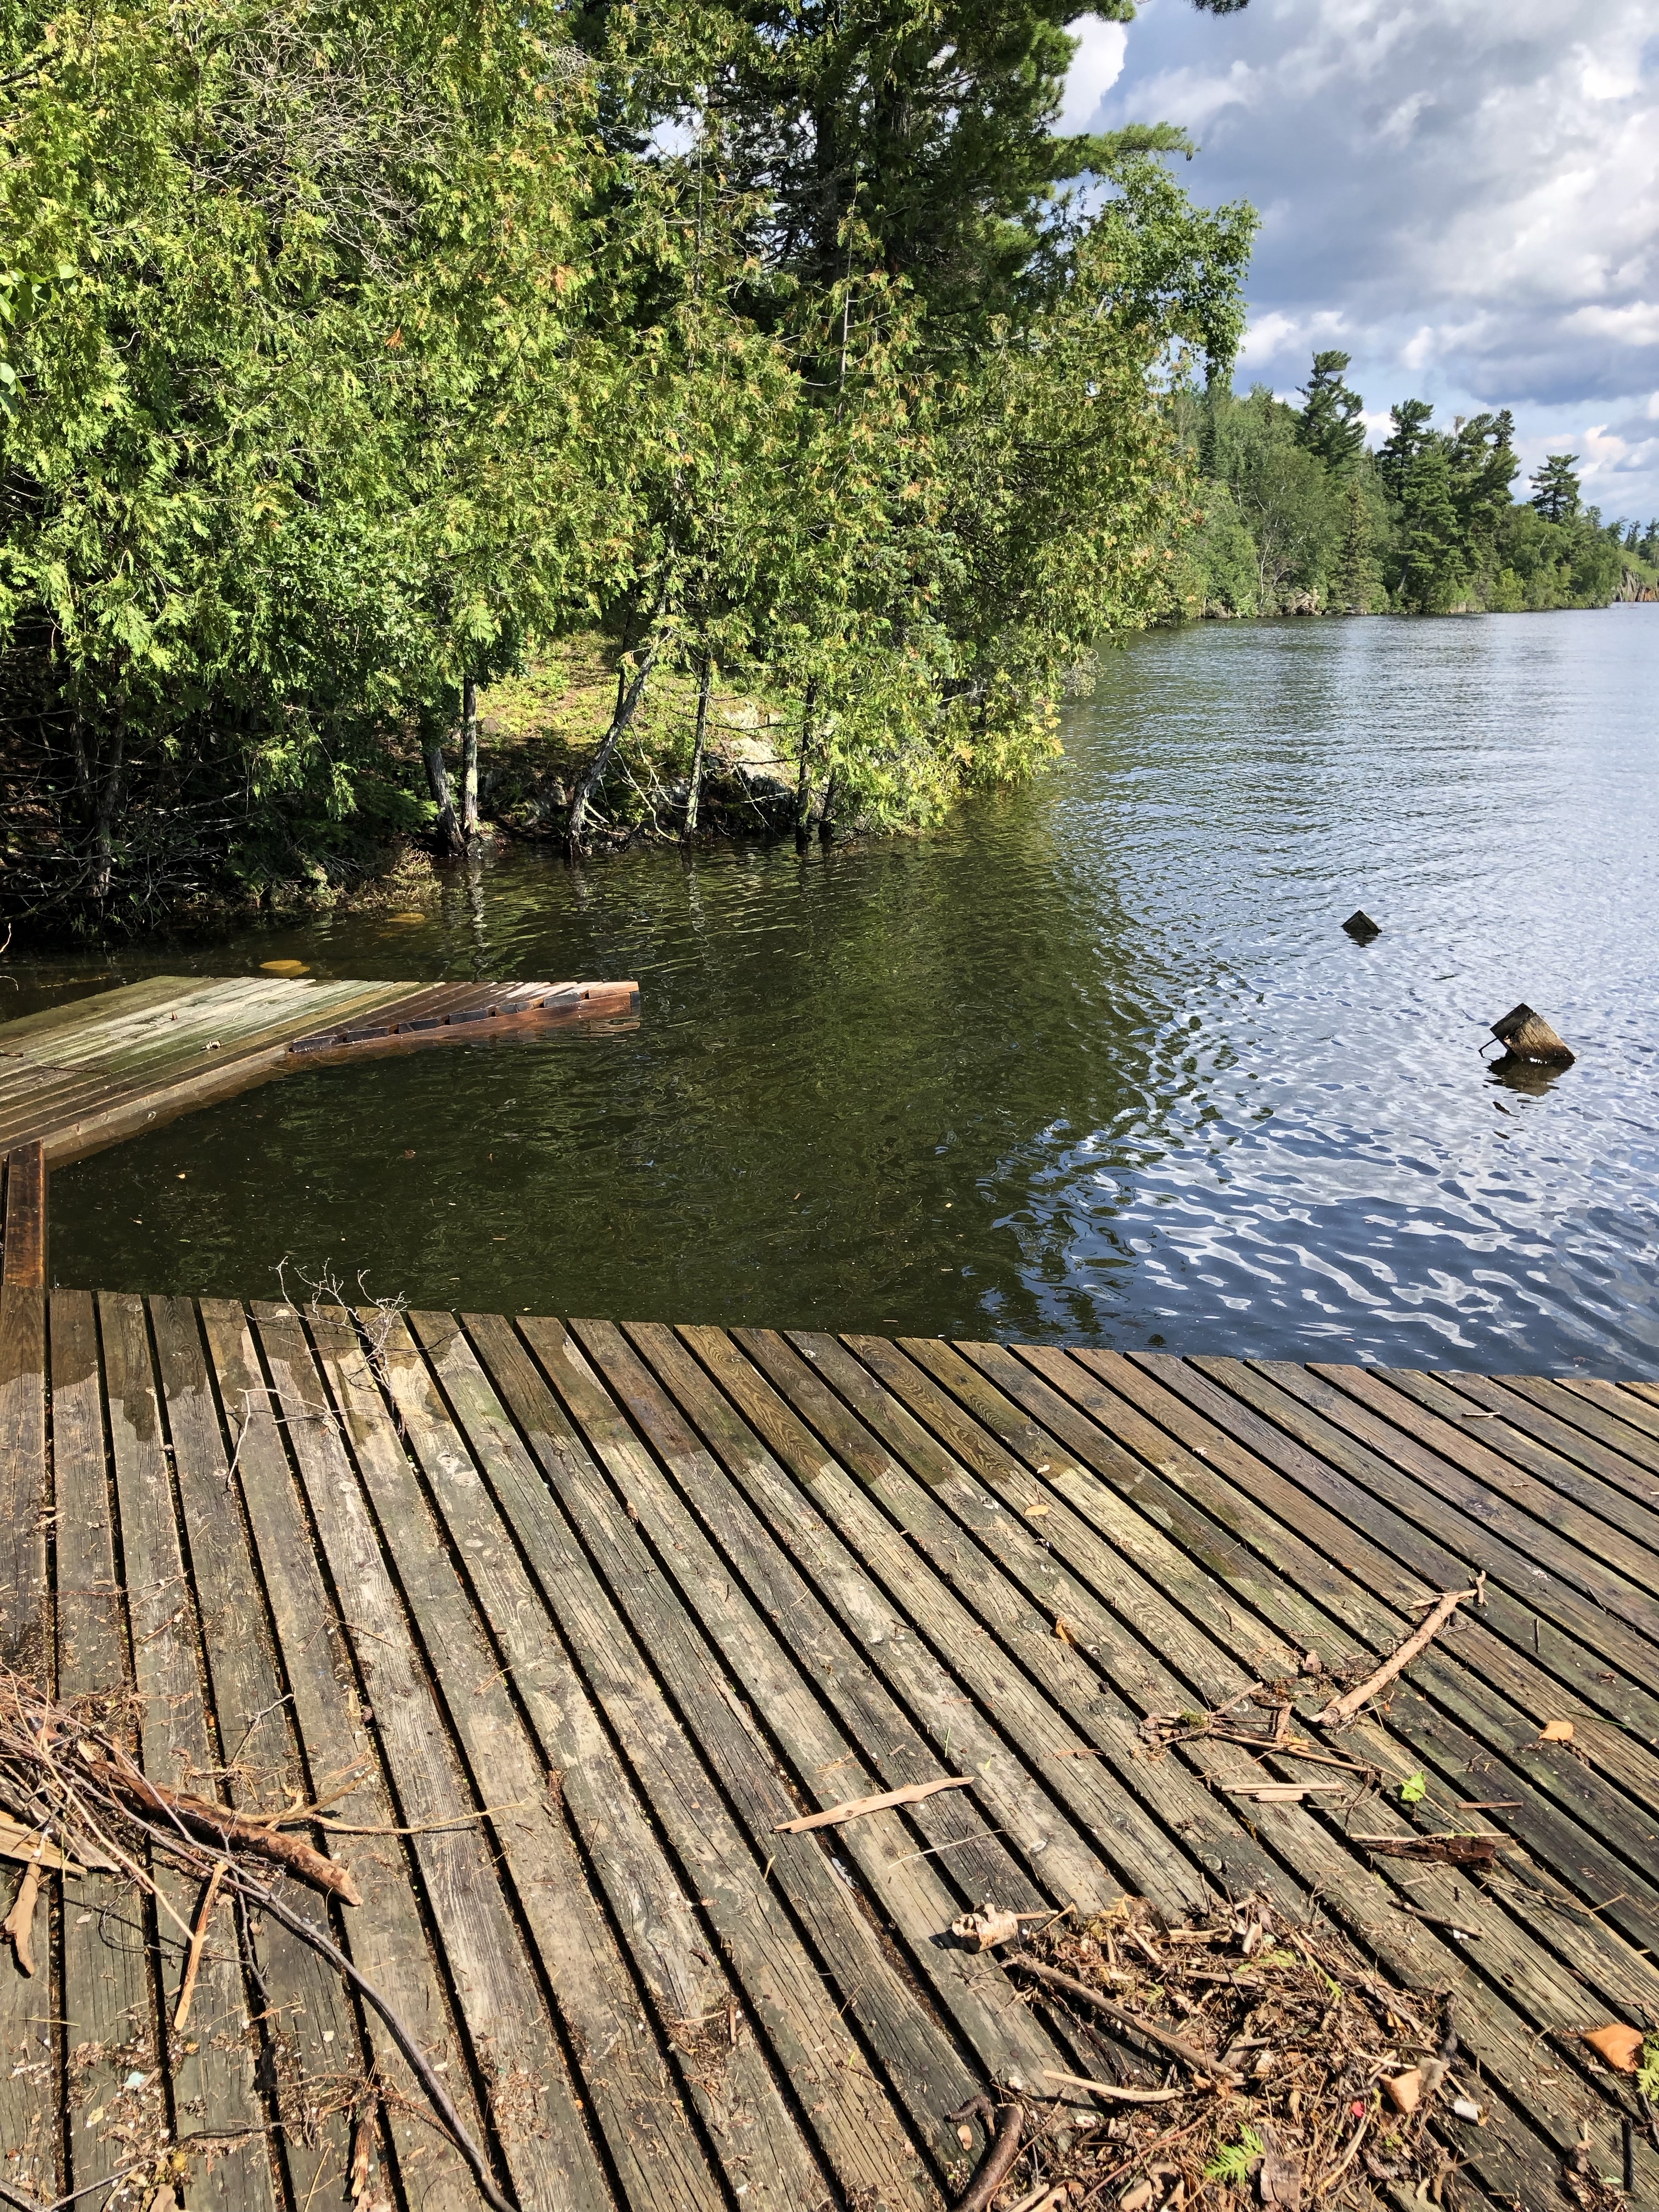
We’re back at the lake and this is the view that greeted me when I went down to the dock.
Hmmm, there is something missing here.
For those in the know there should be a 20’ section of dock with an 8×16’ floating dock attached to it over where those two random looking posts are in the water and connecting to the far left site of the dock that is still holding on, barely.
Yes, the lake level is high and thanks to some recent torrential downpours in the area it continues to go up.
The dock was there last weekend but I suspect due to a violent storm that went through the area on Tuesday July 19th and the ongoing wave action that has been rocking the whole dock system for a couple of months now, it just couldn’t hang on any longer.
Thankfully, the dock segment didn’t go too far away and it’s just around the corner to the north of us in a small bay next to our neighbours dock. I’ve tied it up there and I guess it will remain there until the lake levels go down to a point where repair efforts can be made.
Runaway dock
The lounge chairs that were on the dock also went missing. I did my best “Mike Nelson” impersonation and looked underwater along the shore line between our dock and the neighbours where the runaway dock is currently residing. Turns out they were in front of the floating section at it’s current resting position in about 8’ of water. One by one I dove down, attached a rope and then hauled them back up. The are now tied to the dock to prevent any further underwater recovery efforts.
On the May long weekend as I was checking on various cottage systems during the opening process I noticed a problem with our deck. A fairly significant issue where wood rot on one of the beams is causing it to collapse.
This beam has some serious rot right above the post which is also in rough shape
This issue is at the front (lake side) left corner of the deck that wraps around the entire cottage. This is also the point where the cottage and deck are highest off the ground as the ground is sloping downwards to the lake quite rapidly in this area.
I wasn’t around when the deck was being built and my dad and his friends did it all. There were some interesting decisions made in places and this is one of them. The ground right under this corner of the deck is quite uneven and has some large vertical rocks right where you would normally have the post to support the corner. A decision was made to insert two posts away from this corner and cantilever the deck out away from these two posts.
Far corner just hanging in the air
So the plan I came up with is to build a temporary beam, support the beam on several temporary posts and to use the temporary beam and jacks to lift the deck a bit and cut out the damaged beam. A new permanent beam would be inserted into place onto some new posts and improved footings. The temporary beam would be lowered and removed to complete the repair.
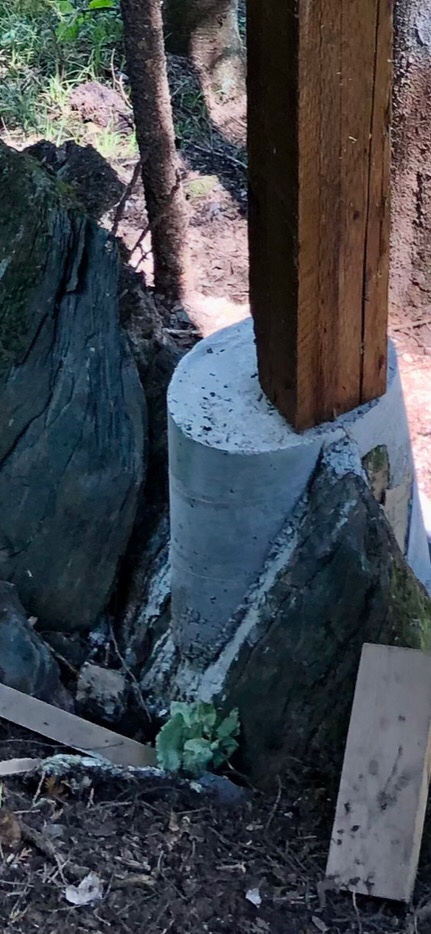
Step one was to tackle the far corner where there is currently is no post by pouring a concrete footing over the vertical rock structure using the rock to anchor the concrete.
The area is pressure washed and as much loose material as possible is removed. Then a sono tube is customized to fit over and around the rock.
Three 30kg bags of ready mix concrete were used and mixed by hand in a wheelbarrow Custom shaping to sono tube to surround the rock
One thing I didn’t anticipate was that cutting the sono tube like this (above) on both sides weakened the structural integrity of the tube. As the concrete was added the weight caused the bottom of the tube to flair out. Several rocks were used to hold it together preventing a blowout.
The resulting shape is a little interesting but it should do the job.
New concrete footing, a little splayed out around the bottom for extra support.
The new temporary beam is quite an engineering feat that I’m hoping will do the job. The main piece is a 2×10 – 12’ with a 2×6 – 6’ stacked on the front end to account for lack of joists in this area because of the direction of the deck boards across the front. A notch is cut in the 2×12 to allow it to fit into some other deck members.
As I’m working alone getting this 2×10-12’ up in the air about 8’ at the far end is a bit of a challenge. I create some slings from some wire and attach the sling to the deck boards above. This way I can lift one end at a time into the slings and then tighten them up to bring the beam up to the underside of the deck. With the temporary beam hanging in it’s rough position I create several footings and posts with jacks on top in preparation for lifting the deck. Did I mention this is a two story deck?
Temporary posts are installed and braced and some existing bracing is repaired on a few other near by posts. 40+ years is tough on the wood that is exposed to the elements.
One of the temporary posts next to the rotted post to be replaced and the temporary beam suspended overhead.My temporary Franken-beam hanging in it’s rough position
The beam being replaced is 16’, my temporary is 12’, what to do? Making good use of various bits and pieces of lumber that have accumulated around the cottage from other building projects I manage to extend the 12’ by an additional 4’. I use two 2×6-6’ and a 2×6-4’ to scab onto the 12’
The back of the beam with 3 2×6’s laminated together supported by a post and a classic screw jack that was my grampa’s
In the middle of the temporary beam is another post with a telepost on topAt the front end another post that was salvaged and in rough shape on top of a footing that is also a bit sketchy with a nice telepost on top. Just over 8’ to the ground in this corner.
All of this so far has taken four days. Not exactly full working days as I start between 9 and 10am by fogging for mosquitoes, applying insect repellent and gathering the tools. I work straight through until 2-3 pm when the insect repellant is wearing off and the mosquitoes are becoming annoying and I’m getting tired. ? Things are slow as the ground is quite uneven and you’re always hunched over under the deck. With extra beams, posts, bracing etc. it’s getting to be quite the obstacle course and I’ve still managed to bang my head on various things several times.
At this point I’m ready to cut all the nails holding the old beam in place and start to lift the deck to free the old beam.
Today was the templating day where they come out and measure your kitchen exactly for the new countertop.
Originally scheduled for around 10:30 there was a cancellation so Larry, the person doing our templating, is able to arrive at around 9 am
We were told by some other folks that they would make a cardboard template of our counters to guide their production of the actual quartz countertop. Turns out that is very old school.
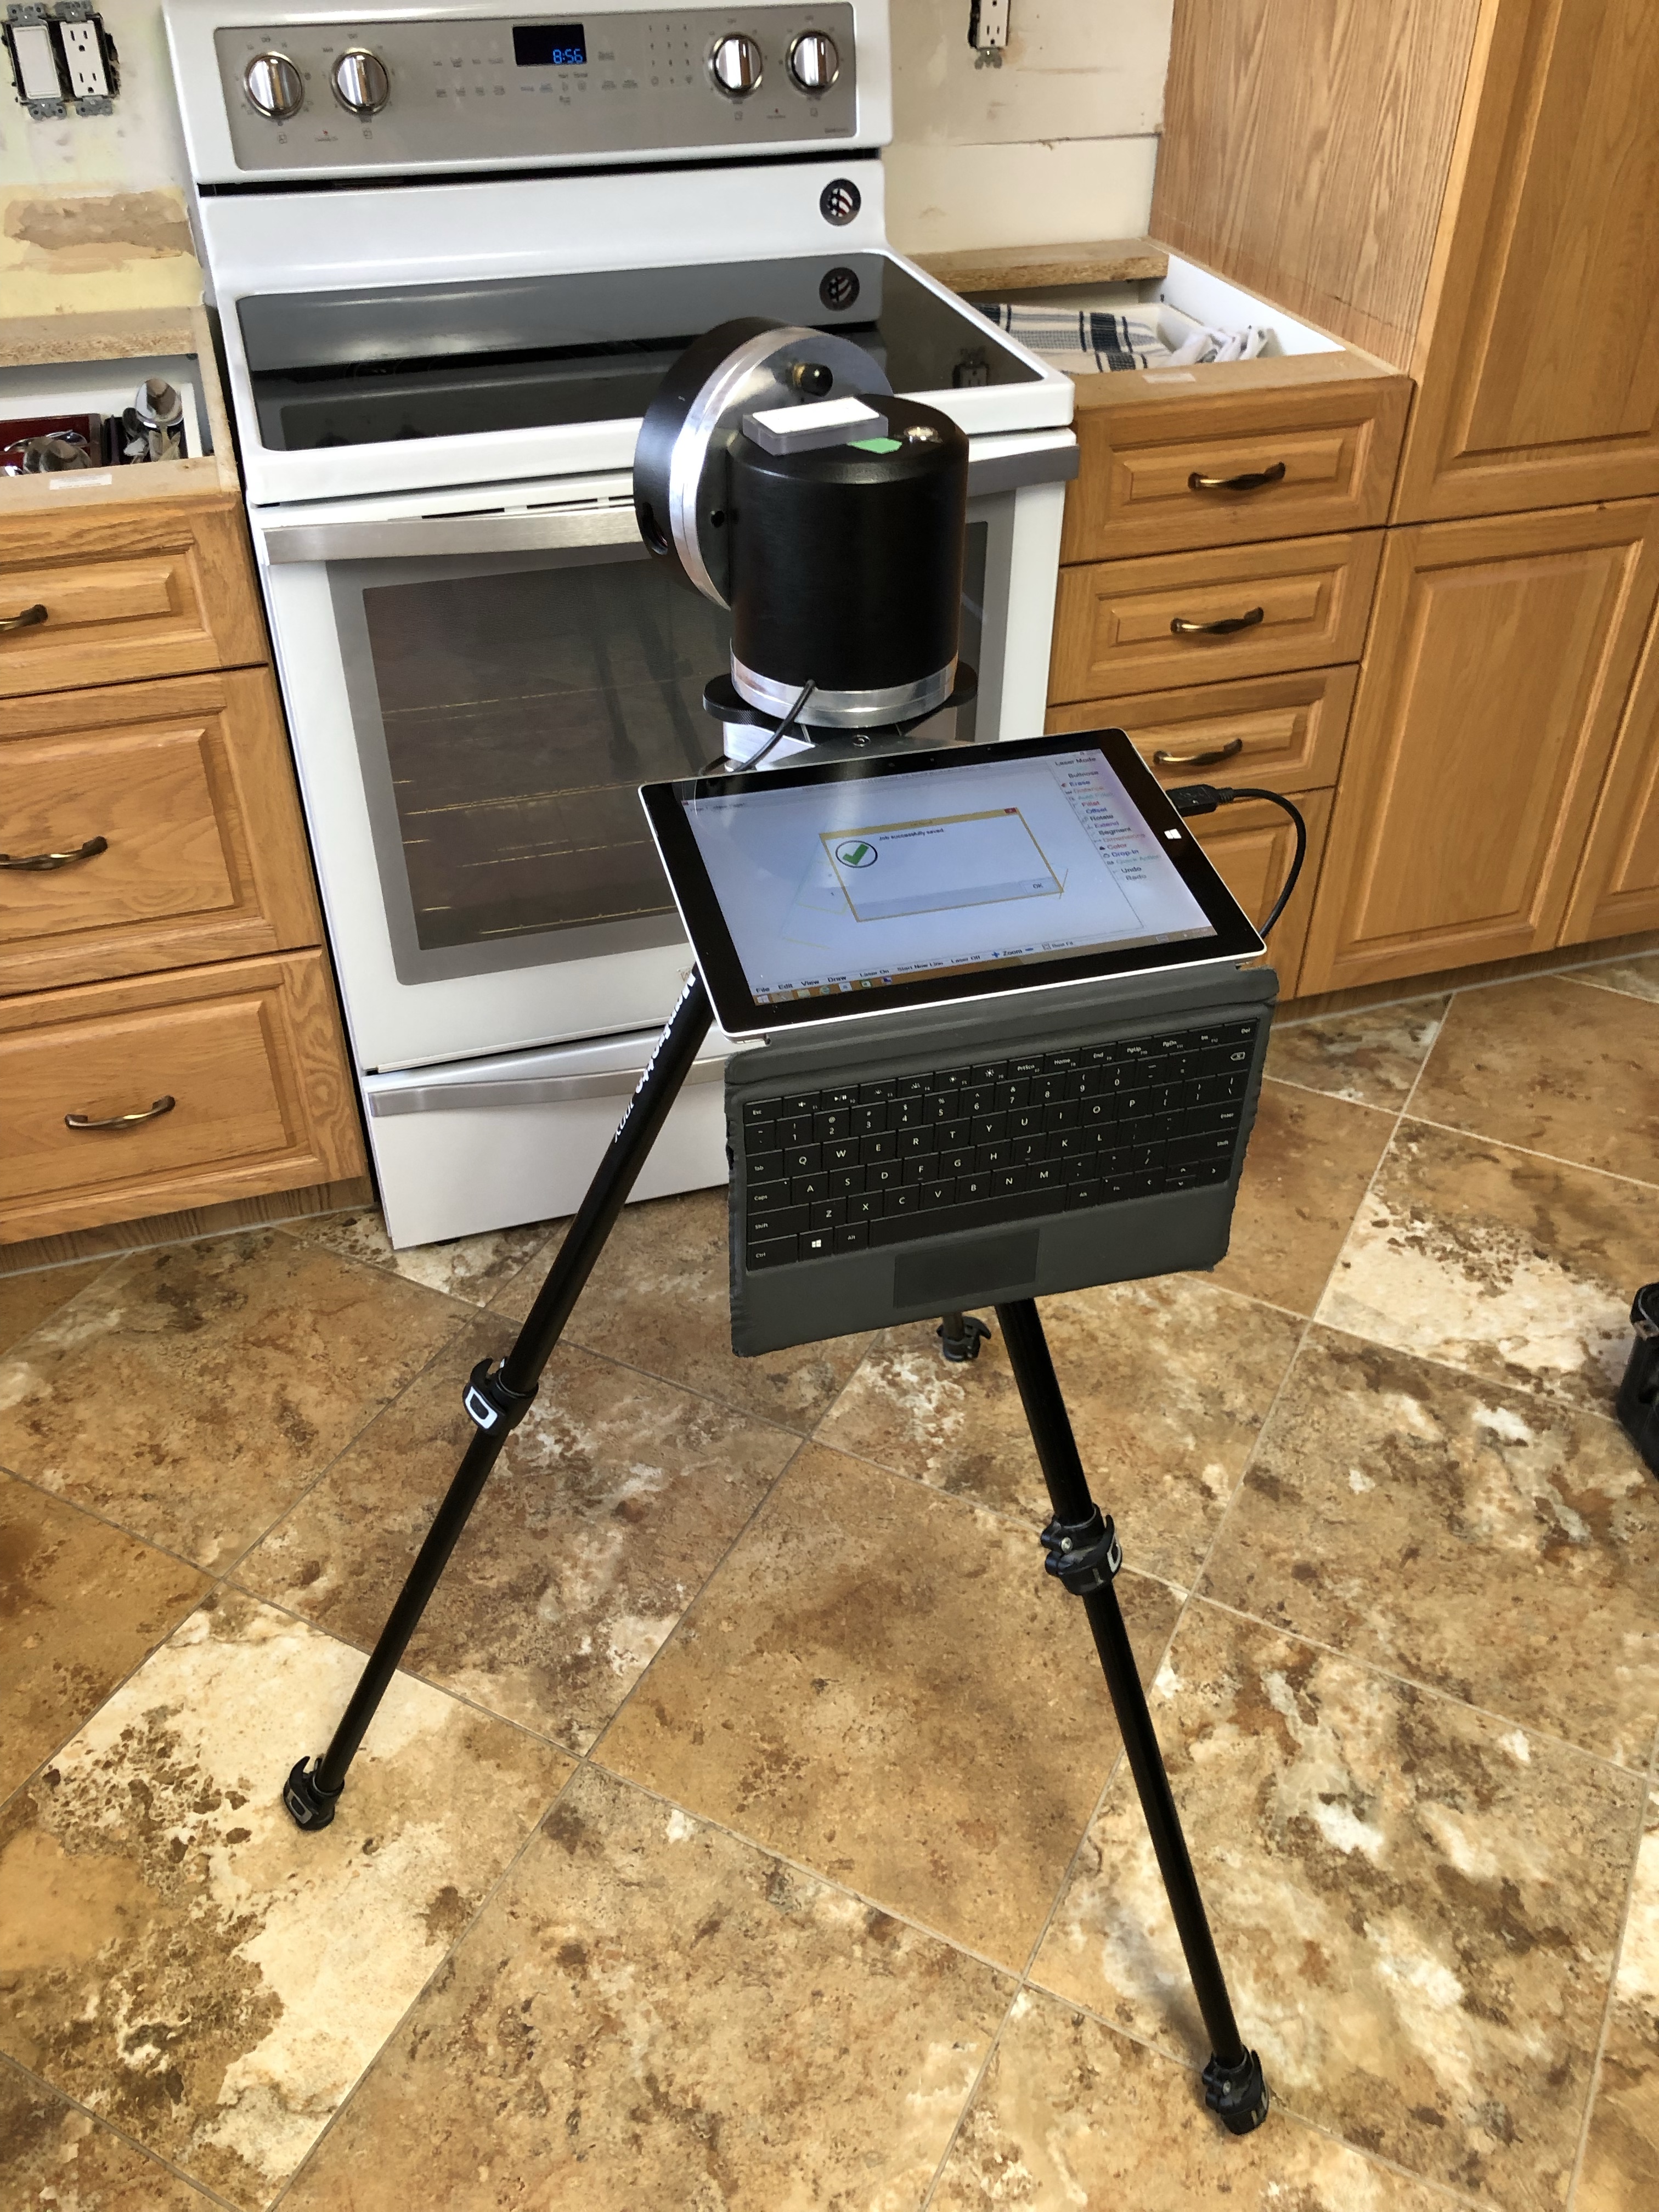
Larry sets up a tripod with a tablet computer and laser on top and proceeds to map out our kitchen with laser precision. I hear a tape measure being used occasionally but probably just to confirm the digital diagram that is being produced.
Larry says it doesn’t matter if your walls are straight or your corners are not square the scanning will take care of all that for a perfect tight fit.
In under one hour we’re signing off (digitally of course) on the finished diagram that will be used to generate the instructions to drive the CNC machine in cutting out our quartz top. Hand cutting stopped 10-15 years ago and it’s all digital now.
In about another hour I have the counters back in place and the sink hooked up again. In 5-10 business days we’ll be getting a visit from the installers and I’ll yank out the current countertops one last time.
Tomorrow the installers arrive to template for the new quartz countertop. That mean that I need to remove the old countertop before they arrive.
Several sections of countertop are easily removed. Just unscrew from underneath, cut off some silicone sealant and off comes the tops.
Counter and old school phone deskRight next to pantry
Then there is the more interesting section, the “L” shape that includes the kitchen sink. My initial hope is to leave the sink in the countertop and remove the whole thing together. This turns out to be more difficult than estimated so I end up removing the sink.
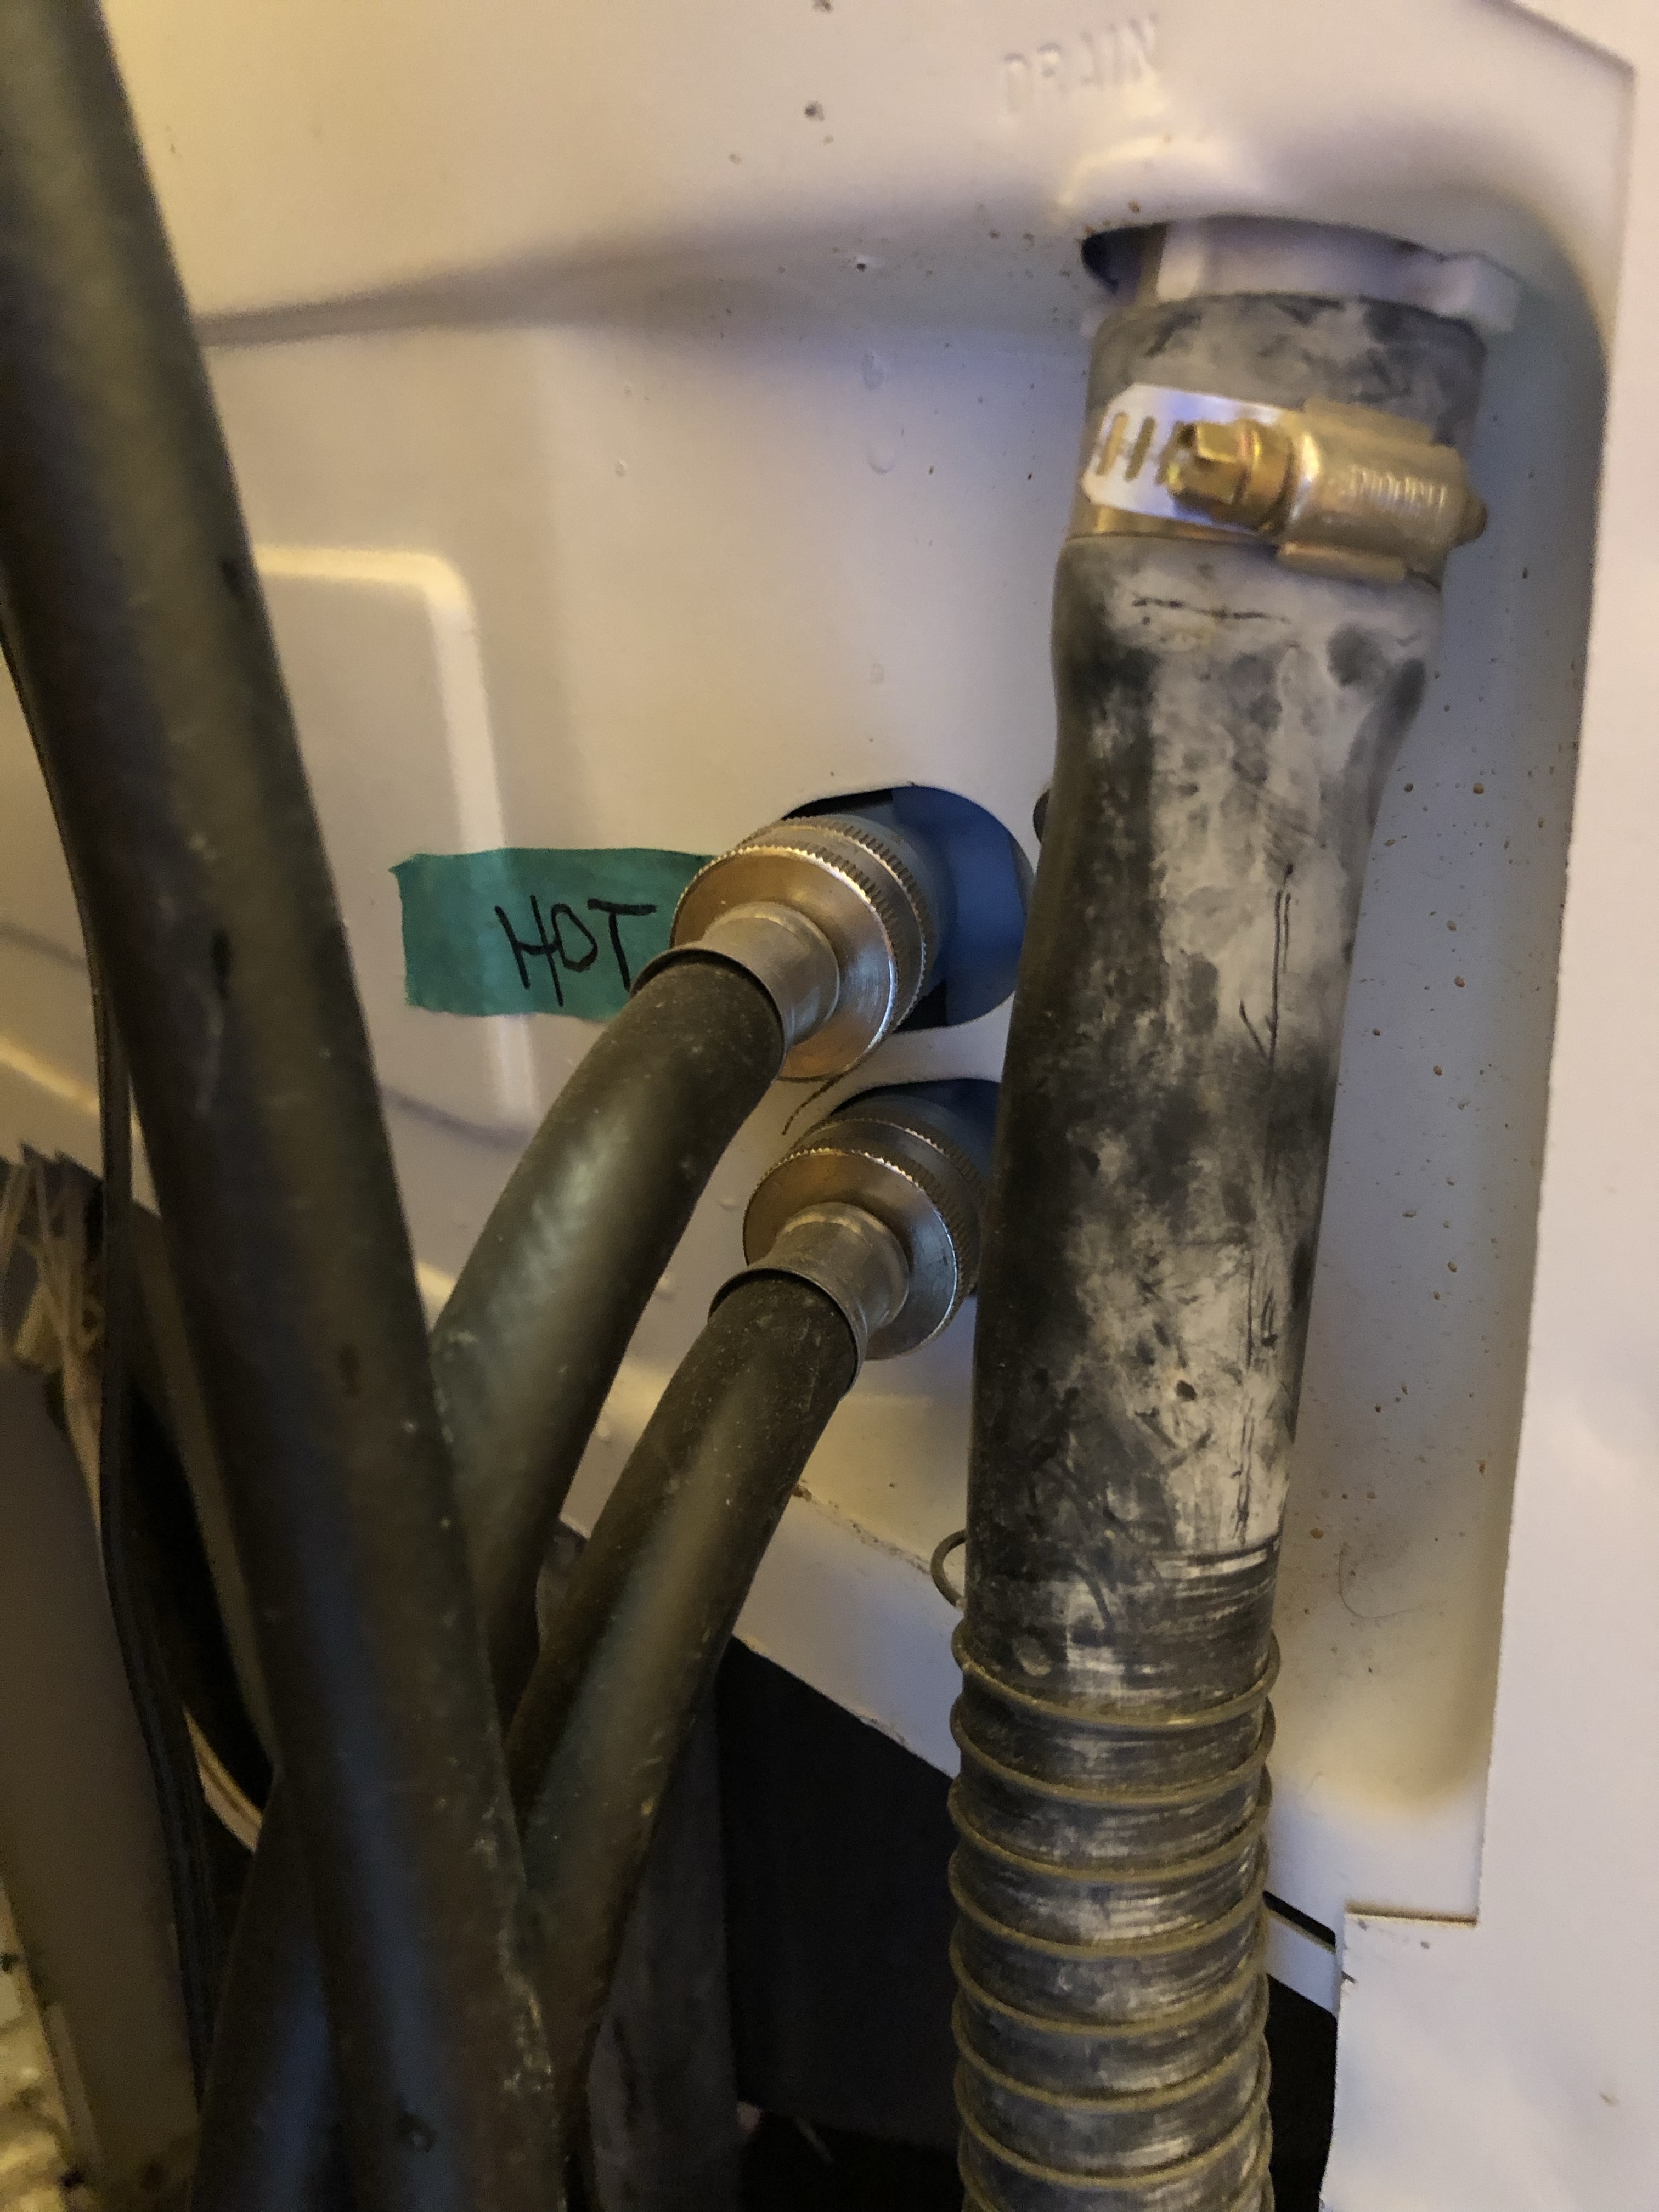
Pulling the sink of course means shutting off the water to the tap. Thankfully, somewhere along the line I’ve installed shutoff valves under the sink so that’s easy. Next is remove the garburator, disconnect the drains, disconnect the tap and unfasten the sink. With all the plumbing disconnected and out of the way the sink pops out without too much difficulty.
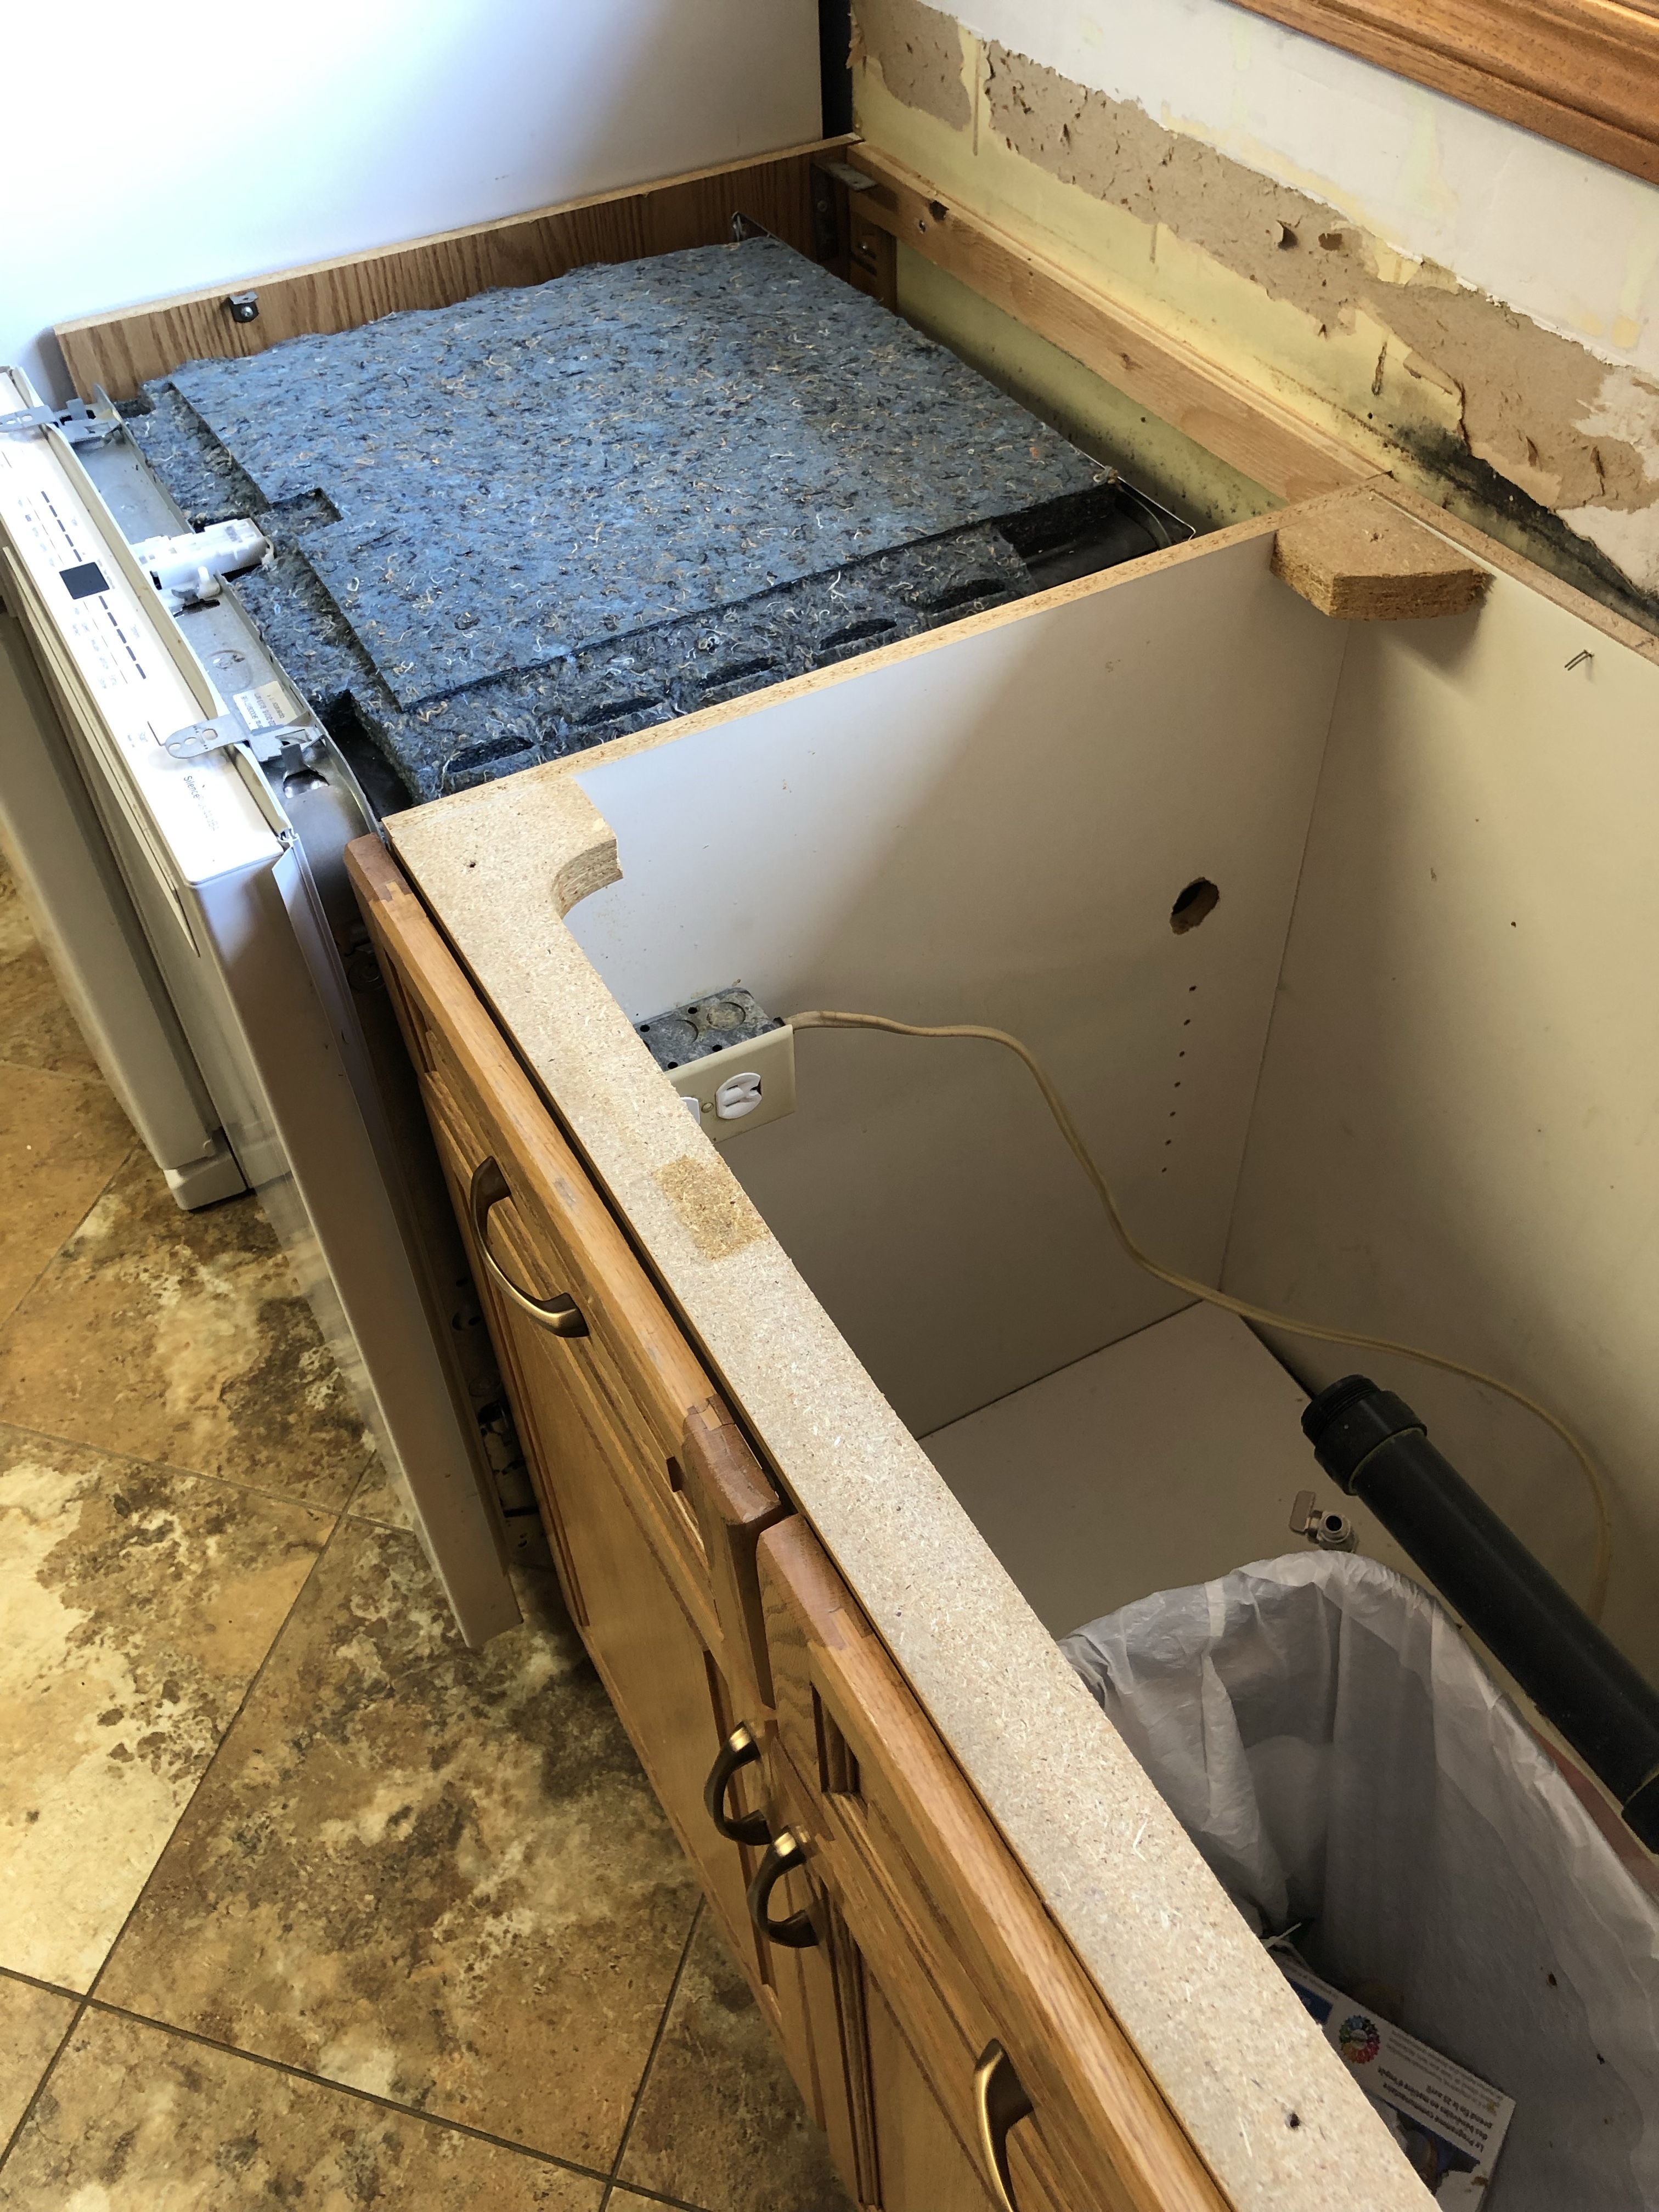
The dishwasher needs to be pulled out to unfasten the countertop. This requires disconnecting the water to it in the basement and again some smart guy installed a shutoff valve for that as well so while the sink & dishwasher are disconnected the rest of the house still has water.
The “L” shape comes off in one piece. It’s snug but comes out clean and is now out in the garage.
Drawers with no lidSink & CornerSink & Dishwasher
Tomorrow, after the templates is done I’ll be reversing the whole process to get the countertop, sink, and dishwasher operational for the 5-10 business days before the final install of the new quartz countertop.
So, for the next 24 hours it’s minimal countertop and washing dishes in the bathtub or stock piling them up in the dishwasher.