Tag: photopills

  • PhotoPills, a learning experience

    PhotoPills, a learning experience

    PhotoPills is iPhone software that helps you plan photographs of the sun, moon, Milky Way and more. I bought the software several years ago but this was the first time I actually planned a photo and when out to execute the plan.

    The idea was to photograph the moon over the iconic Provencher Bridge, more specifically the Esplanade Riel bridge which runs in parallel for pedestrians and cyclists.

    Winnipeg’s Esplanade Riel: A magnificent bridge connecting people and cultures

    This idea was to have the moon right at the top of the peak of the bridge. Here is the plan.

    Overview
    Detail at the shooting spot

    The red pin is the shooting location and the black pin is the centre of the spire on the bridge. The thin blue line is where the moon will be at 6:09am, 2022-01-28, right over the bridge spire.

    One of the tips in planning these photos is to scope out your shooting location physically to get familiar with the area before arriving in the dark, a good tip.

    I thought I knew the area so I skipped the scouting trip. I’d just drive up Waterfront Drive, park near the train bridge (red pin) and I’m good to go. What I didn’t account for was the line of sight from the red dot to the bridge. I get to the spot, turn around, and I can’t see any of the bridge! It’s completely obscured by the large trees that line the river bank and I’m not up high enough to shoot over them. 🙁

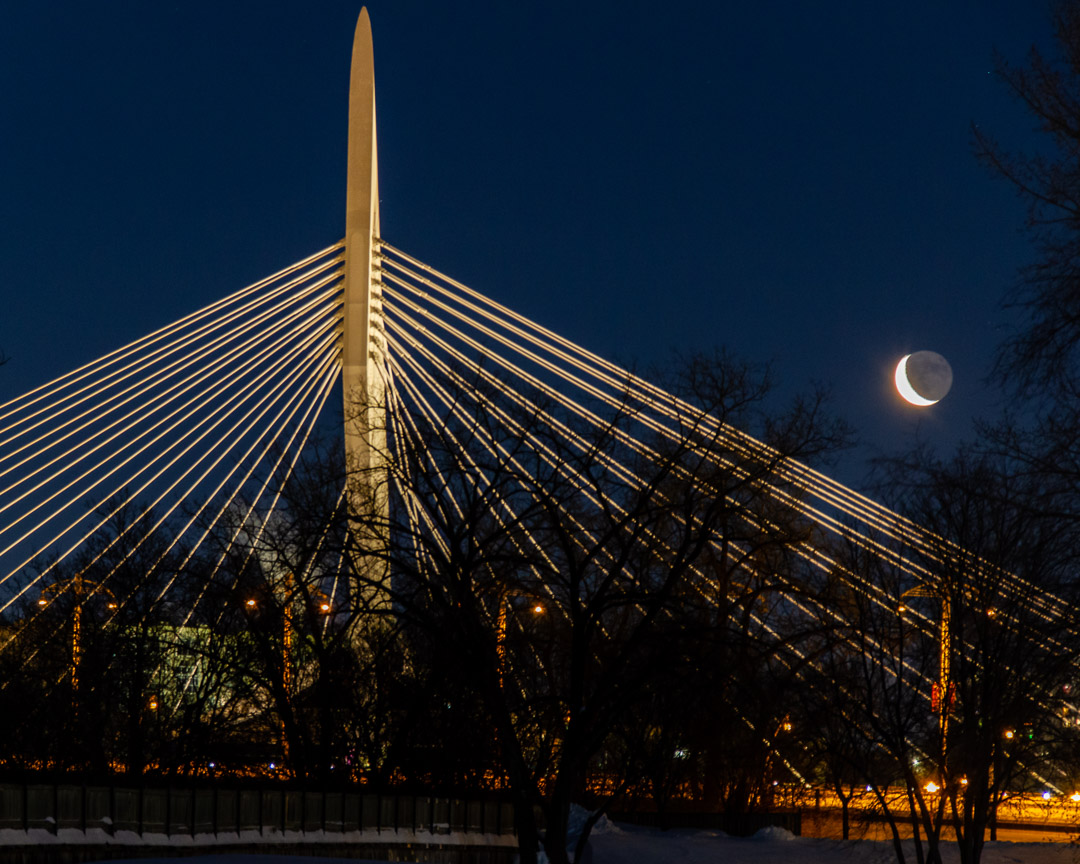
    So, when I moved to a near by spot where could get a good sightline to the bridge, the moon of course was now no longer in the correct position and this was the result.

    A different crop

    The other learning was to better understand how high the moon will be relative to the top of the bridge. Photopills calculates the hight of the moon but you need to figure out how high the bridge is. A little internet searching turned up:

    Top of the pylon is 57 metres (187 ft) above the bridge deck, and the bridge deck is about 11 metres (36 ft) above the water level.

    https://en.wikipedia.org/wiki/Esplanade_Riel

    So, my shooting spot is -10m from the black pin which appears to be the bridge deck not the top of the spire so I’d need the moon to be ~67m. According to Photopills the moon would be 70m higher that the black pin. So, it should have worked, but I wasn’t at the red pin shooting location but the moon seems like it would still be too low.

    My next attempt will be on 2022-02-17 at 12:41am when there will be a full moon. Hopefully, the weather will be good and there will be a clear sky. This time, for sure, my shooting location is better known and there is nothing between the spot and the bridge spire.

  • Night Photography, the 1st attempt

    I’ve never attempted night photography or astronomical photography, until last night. 

    A while back on Black Friday I bought an app that I’d had my eye on for a while. Its Photopills, a very cool tool to assist in planning all kinds of shots involving the sun, moon, milky way and meteor showers. I’d highly recommend this very sophisticated app. There is a bit of a learning curve, but there are lots of video tutorials, manuals, blog posts etc. to get you started.

    So, last night was the height of the Geminids meteor shower and I thought this would be a great opportunity to try to capture my 1st night shot. There is a lot to learn and think about to get good shots and a lot of post processing to get the spectacular images like this. After last night, I’ve got a lot to learn and practice. Let the adventure begin!

    The peak of the meteor shower was to be between 2am and 4am.  This is a little late for me so we head out to Birds Hill park around 1am and hope for the best. Turns out it’s not near dark enough and there is still some significant light pollution from Winnipeg and the town of Birds Hill etc., lesson learned – research a darker location. Thankfully, its warm for this time of year at -1C and only a light breeze, which at 1am seems plenty cold.  I set up the tripod, cable release and the manual exposure settings and get ready to shoot.

    Using the Photopills app and its Night Augmented Reality (AR) capability I figure out which way to look and point the camera. Almost immediately we see a couple of meteors or “shooting starts”, very cool. It seems that the approach is to shoot frequent exposures, each one being 25 sec. and hope that a meteor happens during that timeframe and the camera is pointing the right way. I have the lens set at 10mm (16.1mm effective on my crop sensor camera) so it’s covering a pretty big chunk of the sky. However I’m likely not pointing the camera in quite the optimum direction. I’ve left the Photopills app set for a slightly different date & time, so the Night AR view is not quite right, but it’s sort of close. Lesson #2 learned, check you app settings.

    After taking about 30 photos and not too sure if any of them have captured a meteor I’m getting cold and we pack it in.  After looking at all the photos two have meteors, one is very faint and the other is nice and bright! Success! And here is it after a little quick Lightroom magic.

    My first meteor capture, can you find it?

    So, not only was there a lot of light pollution the white snow cover and the scattered clouds in the sky didn’t help either. Still, not too bad for the 1st effort. Just in case you can’t find the meteor or want a little info on what part of the sky you’re looking at here is some help. I’ve connected the dots for the Big Dipper and an arrow to the meteor.

    Look for the red lines,

    One other surprising thing was how many people are in the park this late at night! Three or four cars drive by our location and on the way out we see another 3-4 cars parked doing who knows what. 😉