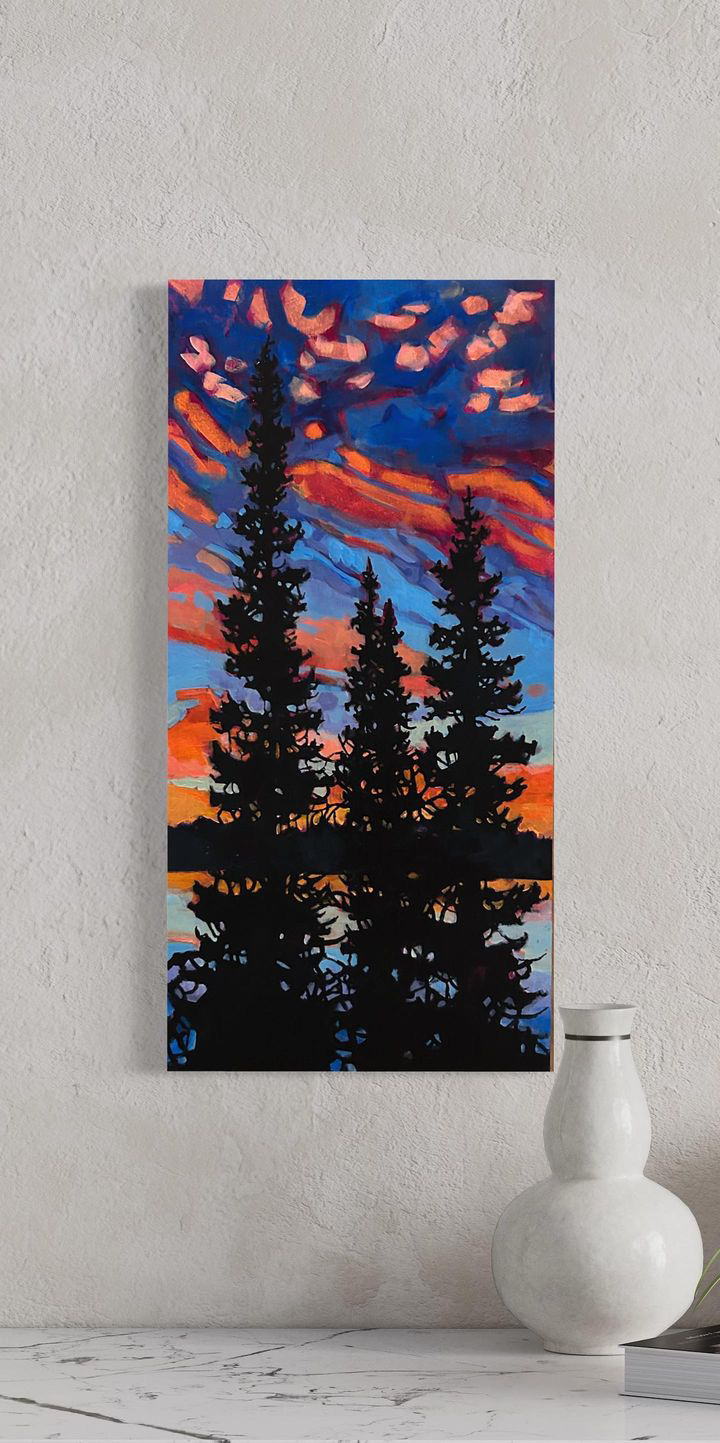
I was surprised and very pleased that one of my photographs on Instagram …

… was an inspiration for a wonderful piece of art!
I’ve taken to calling these trees the Three Sisters.
Latin (tem-pu̇s-ˈfü-git): Time Flies
I was surprised and very pleased that one of my photographs on Instagram …
… was an inspiration for a wonderful piece of art!
I’ve taken to calling these trees the Three Sisters.
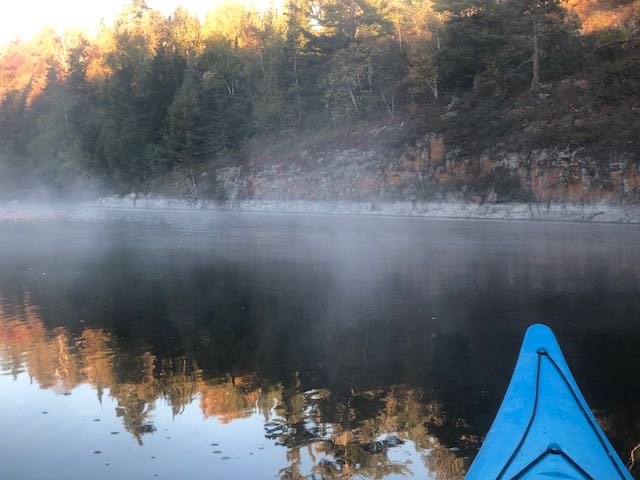
I took a paddle down to the bay at the bottom of our point to be with the wildlife and nature as the sun rose. With a coffee on board it was a leisurely paddle with fog rolling across the water in the coolish 3°.


PhotoPills is iPhone software that helps you plan photographs of the sun, moon, Milky Way and more. I bought the software several years ago but this was the first time I actually planned a photo and when out to execute the plan.
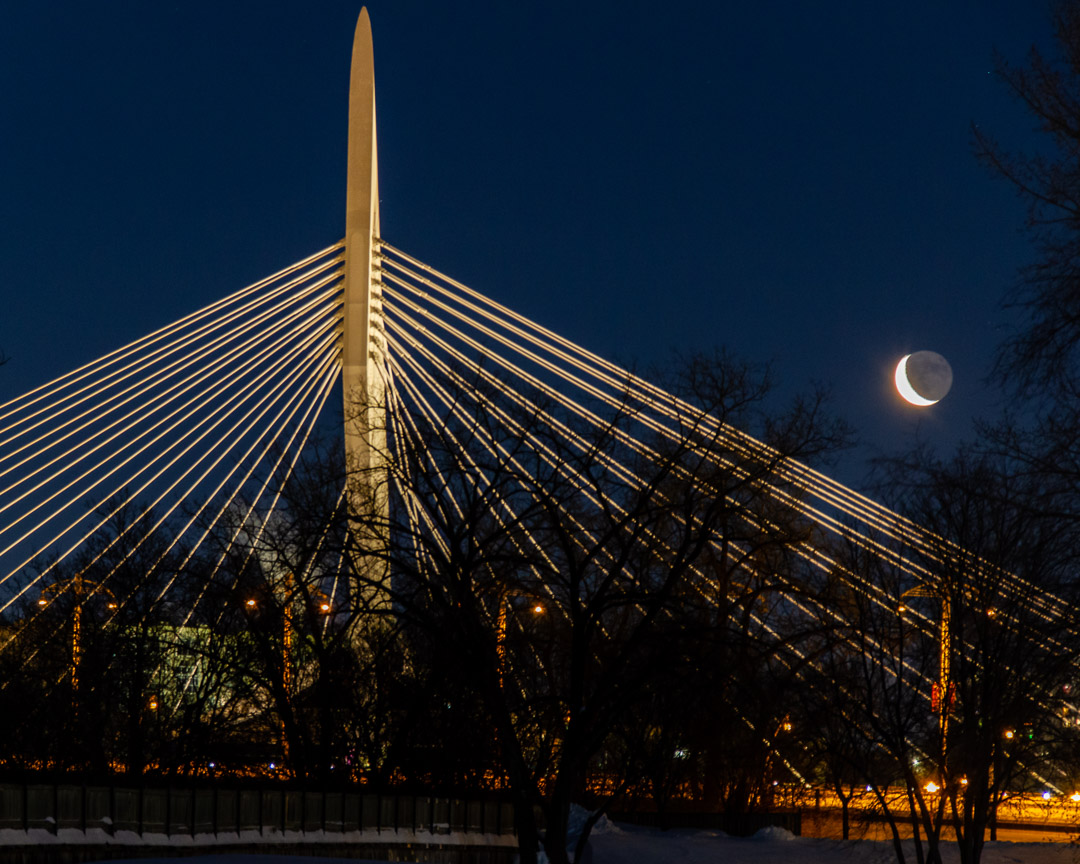
The idea was to photograph the moon over the iconic Provencher Bridge, more specifically the Esplanade Riel bridge which runs in parallel for pedestrians and cyclists.

This idea was to have the moon right at the top of the peak of the bridge. Here is the plan.


The red pin is the shooting location and the black pin is the centre of the spire on the bridge. The thin blue line is where the moon will be at 6:09am, 2022-01-28, right over the bridge spire.
One of the tips in planning these photos is to scope out your shooting location physically to get familiar with the area before arriving in the dark, a good tip.
I thought I knew the area so I skipped the scouting trip. I’d just drive up Waterfront Drive, park near the train bridge (red pin) and I’m good to go. What I didn’t account for was the line of sight from the red dot to the bridge. I get to the spot, turn around, and I can’t see any of the bridge! It’s completely obscured by the large trees that line the river bank and I’m not up high enough to shoot over them. 🙁
So, when I moved to a near by spot where could get a good sightline to the bridge, the moon of course was now no longer in the correct position and this was the result.


The other learning was to better understand how high the moon will be relative to the top of the bridge. Photopills calculates the hight of the moon but you need to figure out how high the bridge is. A little internet searching turned up:
Top of the pylon is 57 metres (187 ft) above the bridge deck, and the bridge deck is about 11 metres (36 ft) above the water level.
https://en.wikipedia.org/wiki/Esplanade_Riel
So, my shooting spot is -10m from the black pin which appears to be the bridge deck not the top of the spire so I’d need the moon to be ~67m. According to Photopills the moon would be 70m higher that the black pin. So, it should have worked, but I wasn’t at the red pin shooting location but the moon seems like it would still be too low.
My next attempt will be on 2022-02-17 at 12:41am when there will be a full moon. Hopefully, the weather will be good and there will be a clear sky. This time, for sure, my shooting location is better known and there is nothing between the spot and the bridge spire.
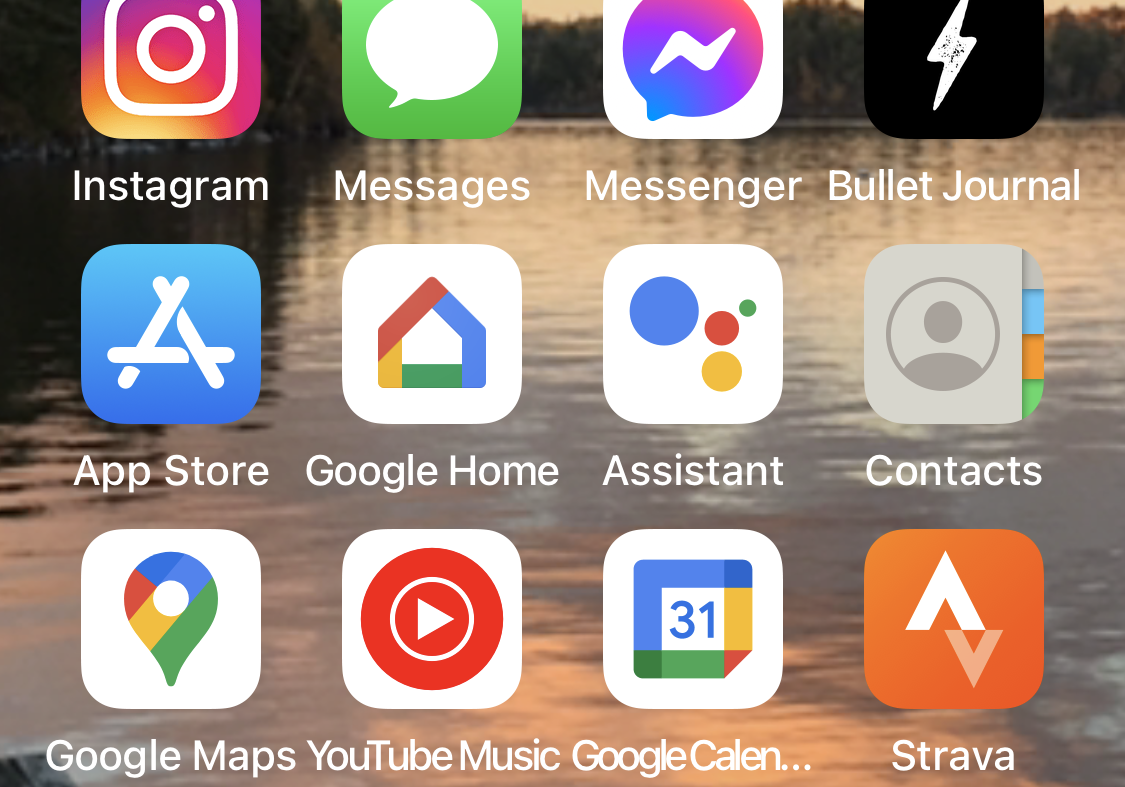

OK, so I’m a bit of an Apple fan, not quite a fan boy, but up there.
With the latest iOS and the ability for widgets on the Home Screen I did some playing around and settled on this Apple widget at the top of my screen.
By default it shows my 6 things in a sort of random, but also some what intelligent way.
First thing in the morning I get a display about what apps I might want to launch, scarily predicting what I might like to do based on past usage. Then the weather, generally useful, the calendar for the day with the next 1-2 events, again useful. Top Apple News stories which is OK but I have not yet succumbed to subscribing. A Map, a bit of a mystery for me and not yet useful. And then there is the best of all!
It’s the photo! Generally, some combination of Grandkids like today’s where we were going to the 2019 Santa Claus parade with all of them together, which is a bit of a rare event to go somewhere all together with just Shirley and I. As I recall it was like hearing cats, but a lot of fun.
If it’s not Grandkids it’s some other photo that Apple has figured out as a “Featured Photo”. Not sure how they do that. Some of them I’ve flagged as “liked” other are well… just photos that show up.
Always brings a smile to my face and an extra bit of happiness to my day.


A sky shot I took at the lake last summer combined with a little Photoshop work, nothing fancy.
Well, I’m actually writing this from memory on December 30th, 2019 as I’ve let this slide for quite a while. Now I have daily reminders to do one post a day to catch up on this trip and a later trip to Phoenix. Hopefully, the photos will trigger the memory on what we did and where we went.
Our first full day in Chicago will be to go downtown and explore the city. I’ve had enough of driving for a bit so we take advantage of the hotel shuttle to take us to the train station to catch the META right into the heart of Chicago. By the time the day is done we’ve walked over 22,000 steps, taken 231 photos, got lost once or twice and managed to catch the right train to get back to the hotel shuttle pickup station. For 60 of the better photos head over to the Flickr Album for this day of the trip.

We arrive at the train station and we’re tourist right? Which side of the tracks should we be on to catch the train into Chicago? I even ask a couple of people, and we’re all tourists and nobody is sure. We hang around first on the “wrong” side and then place our bets on the other side. Eventually some locals show up and confirm, this is it.

We’re farther out in the burbs than I though when I booked the hotel and its an hour ride into the heart of the city, but it’s a fun train adventure, complete with tickets purchased on an app that you show the conductor.

Once we’re downtown the adventure begins. Where to go first? We start by heading towards the lakeshore.

Soon, our first destination has been discovered! It’s the Willis Tower, formerly known as the Sears Tower, for a time the tallest building in the world until 1998, and we’re going to the top! Well, as high as they let tourists go, the 103rd floor. See the tiny looking glass protrusions on the building on the right? These little glass boxes are for the tourists like us. They can be retracted in bad weather or pushed out on a rail system for some pretty crazy views. You get 30 seconds at a crack to get your photos and selfies. Speaking of “crack” the glass floor did “crack” later in the year after our visit!
Before we head up, we go down into the lower levels of the building and weave through a long series of displays letting you know some of the key moments in the windy cities history. Thankfully the crowds are light and we motor through the exhibits to the elevators.


And we’re up on the Skydeck! The weather is great and it’s a super clear day this morning and we can see all over town and out into Lake Michigan. This is the tallest building in the Western Hemisphere at 1,353 feet.

Now for the fun part. We wait a short time in line to get our 30 seconds on the Ledge. The Ledge’s glass boxes extend out 4.3 feet out from the Skydeck. Shirley is all relaxed until she steps out onto the glass floor and looks down. Suddenly, not so relaxed. 🙂


Back down on the street we wander around generally towards the lakeshore and Millennium Park. Along the way we go under the Chicago “L” several times. I’m pretty sure some car honked at me as I stopped in the middle of the street to line up this shot. We gawk at all the different shops and cool building architecture and eventually make our way over to the park.


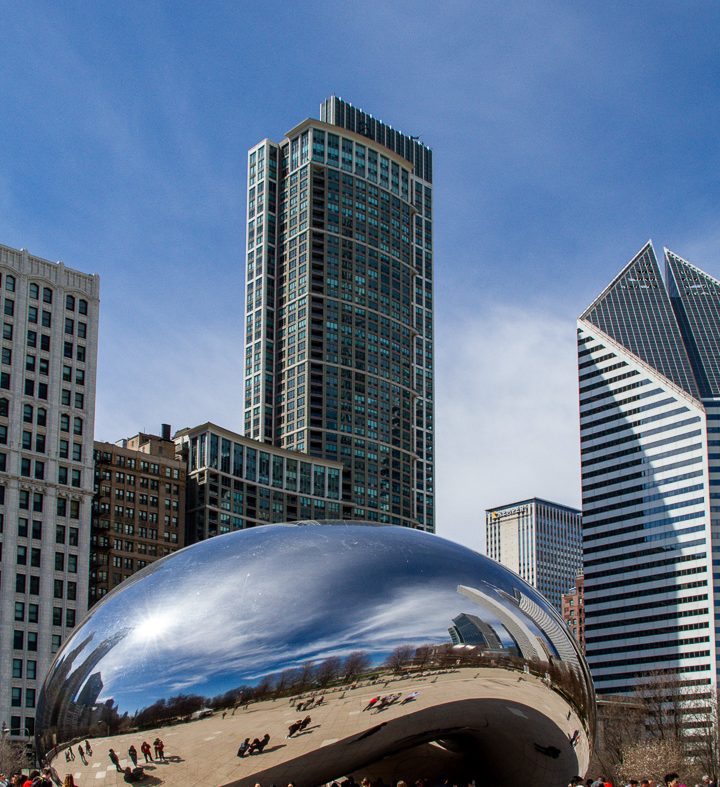
The big attraction at the Millennium Park? The Bean, aka Cloud Gate of course!

After a bunch of Cloud Gate photos, we continue our exploration along the Chicago Riverwalk.


At this point we’ve walked quite the distance and we’re at the farthest point from the train station. So, we head back and zig zag through the streets to find our train. Inspire of using Google Maps, I get us lost and we actually walk past the station by several blocks before Shirley asks a guy for directions.

Again, we locate the departing train track without too much trouble, buy tickets with the app and we’re on our way back to the hotel. A new train “wrinkle” for us though. Apparently, we’re in a “quiet” car where there are no announcements about the stations coming up. This is for the seasoned train riders who want a peaceful ride home after a hard day in the big city. For rookies like us this is not good. Eventually, we clue in and move up several cars where they are calling out all the stops.
The hotel shuttle picks us up and we enjoy the complimentary snacks and drinks in the hotel lounge that are sufficient for dinner, and that’s the end of Day 1 in Chi Town.
We had Easton and Clark for the weekend, which was a lot of fun. Part of the weekend was a “guys” trip to Fort Whyte Alive for some outdoor activities on a very warm and sunny Saturday afternoon.
I was interested in the geese, but the boys were way more interested in the ice, water puddles and sticks.


The geese were quite accommodating to a photo or two and allowed some quite close approaches before flying off all the while honking loudly at this guy who was disturbing them.

I’ve always been a fan of the strobist and just a few days ago I decided to actually try & practice his Lighting 101.
It was pretty easy to get started as over they years I, Eric & Scott have accumulated all the necessary gear, and it just happens to be currently in my closet. We share a nice Manfroto tripod with a good head. I have a Canon 600EX-RT flash and Eric has a Canon 430EXII flash, so I’m good for a two light setup. Eric also has a Cowboy Studio kit with 2 stands, multiple umbrellas, and all the bits and pieces to mount the flashes and umbrellas to the stands etc. A while back I bought a 50′ flash cable for connecting the off-camera flash to the camera and the two Canon flashes can be configured for wireless triggering as well. Yahoo! I’m ready to go!
So, following the first part of Lighting 101 I set up for the one flash off-camera at a 45° angle and 45° up configuration and get it all jammed into my office. Here is what it looked like.

After a few test shots and some flash power level adjustments I’m getting some pretty nice results IMHO. I’m hopping up and down to check the image on the back of the camera after every shot as I’m using a timed release to shoot myself as the subject, sitting in the office chair. Then I remember that Lightroom will do tethered capture. I have a cable for that and the computer is close, so a new experience using the tethered capture which is pretty sweet.
Part of the tethered capture allows you to apply a bunch of presets so here is a black and white look.

Then there is a more normal unprocessed look.

Even Shirley got in on the action.

Looking forward to more experimenting and learning with the rest of 101 and then 102, 103.
I’ve never attempted night photography or astronomical photography, until last night.
A while back on Black Friday I bought an app that I’d had my eye on for a while. Its Photopills, a very cool tool to assist in planning all kinds of shots involving the sun, moon, milky way and meteor showers. I’d highly recommend this very sophisticated app. There is a bit of a learning curve, but there are lots of video tutorials, manuals, blog posts etc. to get you started.
So, last night was the height of the Geminids meteor shower and I thought this would be a great opportunity to try to capture my 1st night shot. There is a lot to learn and think about to get good shots and a lot of post processing to get the spectacular images like this. After last night, I’ve got a lot to learn and practice. Let the adventure begin!
Using the Photopills app and its Night Augmented Reality (AR) capability I figure out which way to look and point the camera. Almost immediately we see a couple of meteors or “shooting starts”, very cool. It seems that the approach is to shoot frequent exposures, each one being 25 sec. and hope that a meteor happens during that timeframe and the camera is pointing the right way. I have the lens set at 10mm (16.1mm effective on my crop sensor camera) so it’s covering a pretty big chunk of the sky. However I’m likely not pointing the camera in quite the optimum direction. I’ve left the Photopills app set for a slightly different date & time, so the Night AR view is not quite right, but it’s sort of close. Lesson #2 learned, check you app settings.
After taking about 30 photos and not too sure if any of them have captured a meteor I’m getting cold and we pack it in. After looking at all the photos two have meteors, one is very faint and the other is nice and bright! Success! And here is it after a little quick Lightroom magic.

So, not only was there a lot of light pollution the white snow cover and the scattered clouds in the sky didn’t help either. Still, not too bad for the 1st effort. Just in case you can’t find the meteor or want a little info on what part of the sky you’re looking at here is some help. I’ve connected the dots for the Big Dipper and an arrow to the meteor.

One other surprising thing was how many people are in the park this late at night! Three or four cars drive by our location and on the way out we see another 3-4 cars parked doing who knows what. 😉