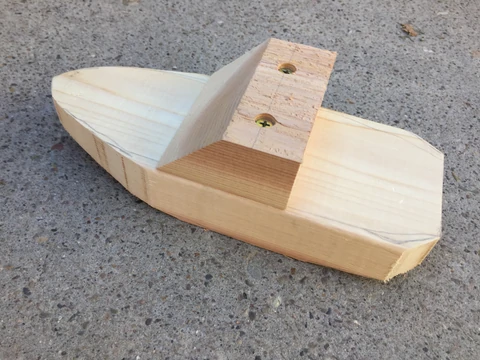
This Drill Press Belt Sander project caught my eye in a recent issue of Wordsmith magazine, a long time favourite magazine of mine that I recently re-subscribed to. It seemed like it would come in handy (some day ?) and I wanted a bit of a project to work on. I have a drill press and I thought I had most of the materials hanging around the shop as I keep most odds and sods, just in case.
The Plan
Well, the deeper I got into the build the more I was making a run to Home Depot or Lee Valley or ordering some needed part online. I didn’t keep accurate track of the costs but I’m guessing a minimum of $200 of wood, knobs, hole saw, bolts, steel rod, threaded rod not to mention the sandpaper belts.
I seem to have had some new motivation lately to accomplish a few long outstanding tasks around the house.
We have 3 basement windows that were never finished when the basement was developed. I just didn’t know how to tackle trimming them out without a lot of messing about. And then, early in the pandemic, I saw and Instagram reel from a finish carpenter essentially building a box with trim attached on one side of the box opposite the window and then you just shove it into the rough window opening. Genius! I made 2 of them and they were a big success. But, for some reason, window #3 got neglected for quite some time. And then the third window finally got it’s trim on.
Project #1 completed.
When we finished the basement, many years ago, there was an opening left in the drywall to access the area under the stairs which we, like most people, use for a storage area. Well, the opening was an unusual shape and off and on I’d think about how to finish it off with some kind of door. And then I’d forget about it and a few more years would pass.
Finally, I decided to build a custom door. I remembered some 1/4” oak plywood in the garage so I build a frame using a Kreg pocket hole jig to fasten the frame together and sheeted if over wth the 1/4” ply and trimmed out all the edges with oak moulding.
Project #2 completed.
Again, a door opening in the basement where we had planned to put French doors into just never got completed. Finally, after deciding the French doors were not happening, the opening was painted to match the rest of the basement but it was still exposed 2x4s and the edge of the drywall.
After buying some very expensive architectural moulding which made the job simpler and some oak trim to match the other basement doors, voila!
Project #3 completed.
Last one. Can you figure this one out?
Well, the wall going downstairs to the basement had quite a few dings, scrapes, scuffs and some patching that never got painted. So, some washing, patching, sanding and a fresh coat of paint has it looking like new.
Well, it’s been almost 20 years in the making but it’s done!
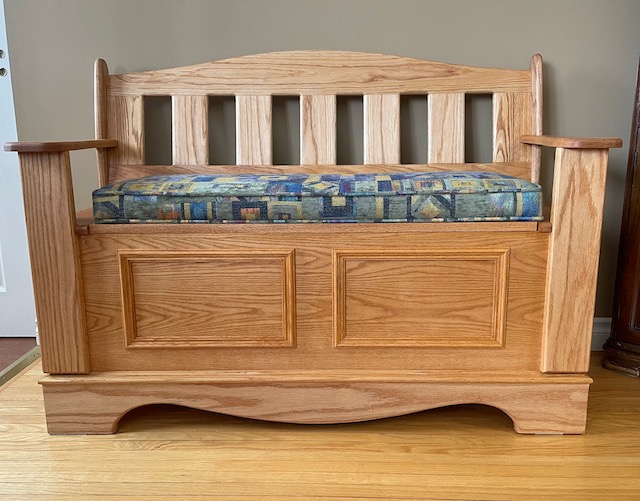
The Decon’s Bench
The project started as a 50th birthday present for Shirley. Somehow it got derailed many times over the years. I’d build a part of it and then park it away in the corner of the shop. You’d think it would have been completed last year with the lockdowns and all the time at home and while it did get some attention it wasn’t until the end of 2021 and January 2022 that the push was on for completion.
So, what is a Decon’s Bench? There seems to be a mixed opinion on the origin and purpose but it seems that a bench with a storage space under the seat is common. Ours has a flip up lid under the seat cushion with a large storage area underneath. For us it’s a place to sit when you’re putting on your shoes or boots.